For anyone who has used Okta before knows the benefits to having a cloud identity store. Those benefits can be easily extended to Aruba Central. This will show you how to enable SSO integration with Okta.
Before you Begin
Go through the SAML SSO feature description to understand how SAML framework works in the context of Aruba Central.
Steps to Configure SSO/SAML Application in Okta
To configure application metadata in Okta, complete the following steps:
- Step 1: Create an Okta SAML application
- Step 2: Configure Sign On settings
- Step 3: Export the SAML 2.0 IdP metadata
- Step 4: Create SAML Authorization Profile in Aruba Central
Step 1: Create an Okta SAML Application
- Log in to the Okta administration console.
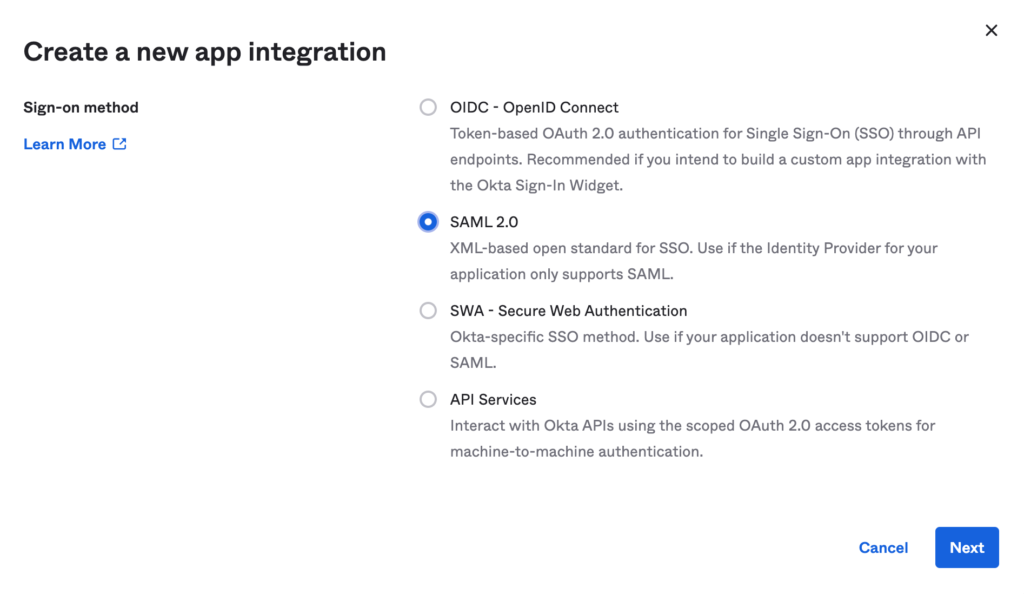
- Click Applications > Create App Integration. The Create a new app integration window opens.
- Select SAML 2.0 and click Next.
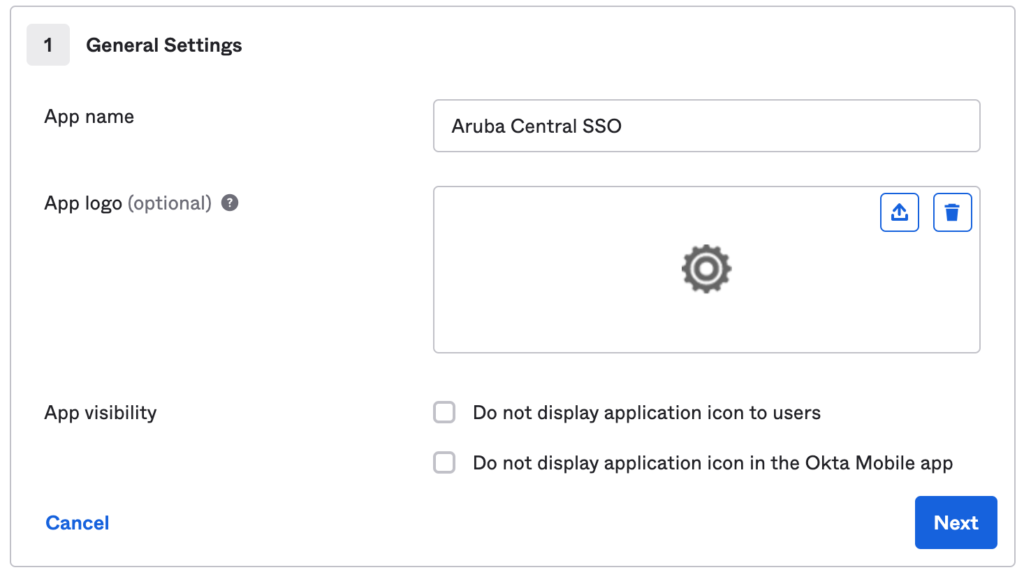
- Provide a name for the Aruba Central SSO service (Okta Application)
Step 2: Configure Single Sign On settings
- Enter the SAML information.
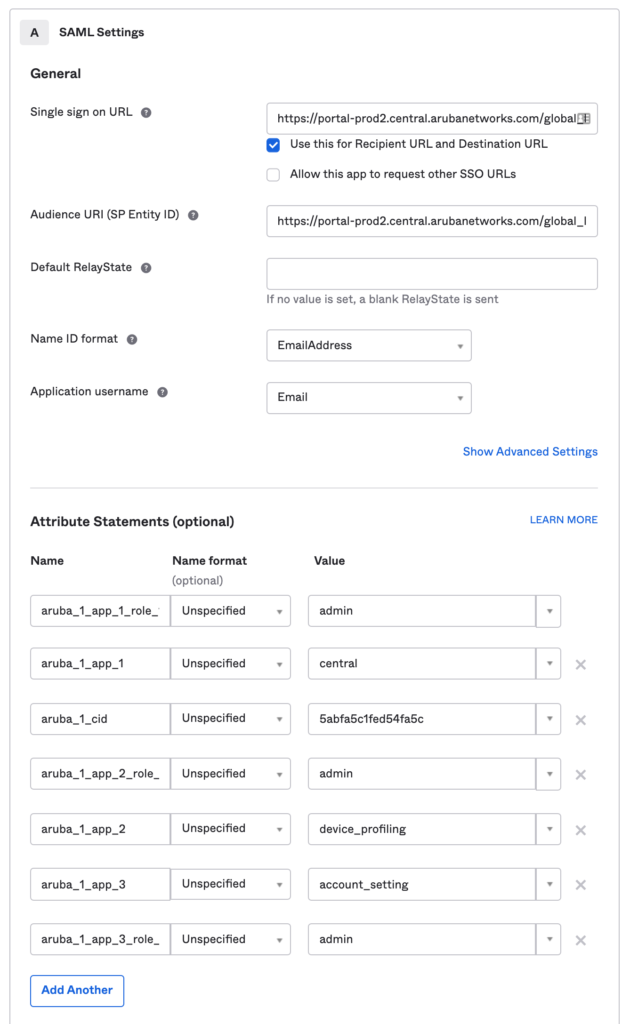
Under General > Single Sign on URL configure the URL based on your cluster and add your Domain Name:
US-1: https://portal.central.arubanetworks.com/global_login/aaa_saml/<<Domain Name>>?acs
US-2: https://portal-prod2.central.arubanetworks.com/global_login/aaa_saml/<<Domain Name>>?acs
US-WEST-4: https://portal-uswest4.central.arubanetworks.com/global_login/aaa_saml/<<Domain Name>>?acs
China-1: https://portal.central.arubanetworks.com.cn/global_login/aaa_saml/<<Domain Name>>?acs
Canada-1: https://portal-ca.central.arubanetworks.com/ global_login/aaa_saml/<<Domain Name>>?acs
EU-1: https://portal-eu.central.arubanetworks.com/ global_login/aaa_saml/<<Domain Name>>?acs
APAC-1: https://portal-apac.central.arubanetworks.com/ global_login/aaa_saml/<<Domain Name>>?acs
APAC-EAST1: https://portal-apaceast.central.arubanetworks.com/ global_login/aaa_saml/<<Domain Name>>?acs
APAC-SOUTH1: https://portal-apacsouth.central.arubanetworks.com/ global_login/aaa_saml/<<Domain Name>>?acs
Example US-2: https://portal-prod2.central.arubanetworks.com/global_login/aaa_saml/customerxyz.com?acs
Audience URI (SP Entity ID) set to the same URL as above (Single Sign on URL)
Name ID format EmailAddress
Application username Email
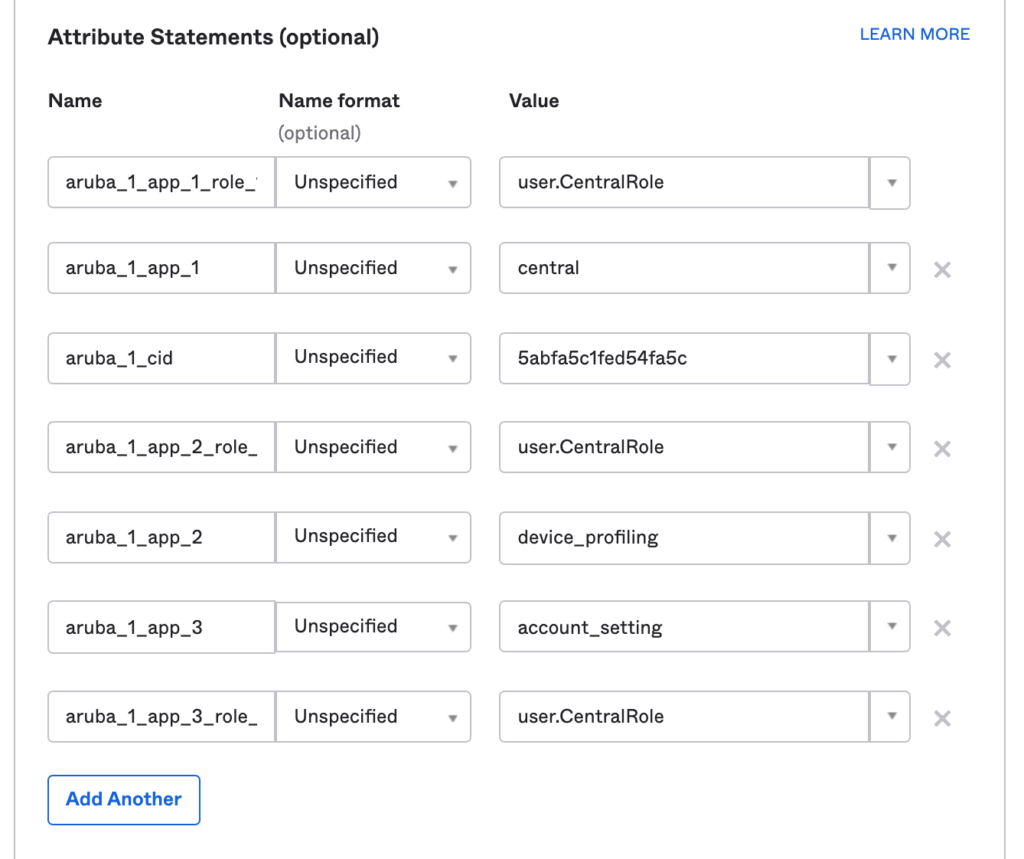
Attributes Statement
-For the purpose of this guide, the values are static. Depending on the customer most likely these values will be dynamic as this will control what access to services (read/write) each user will be granted. End of the documents I’ve provided an example of a dynamic lookup of the central role using attributes from the Okta user profile.
aruba_1_cid = <customer-id>
# app1, scope1
aruba_1_app_1 = central
aruba_1_app_1_role_1 = <readonly>
aruba_1_app_1_group_1 = groupx, groupy
aruba_1_app_2 = device_profiling
aruba_1_app_2_role_1 = <readonly>
aruba_1_app_3 = account_setting
aruba_1_app_3_role_1 = <readonly>
See here for IdP attribute details: https://help.central.arubanetworks.com/2.5.3/documentation/online_help/content/nms/user-mgmt/conf-idp-attributes.htm
- Complete the setup.
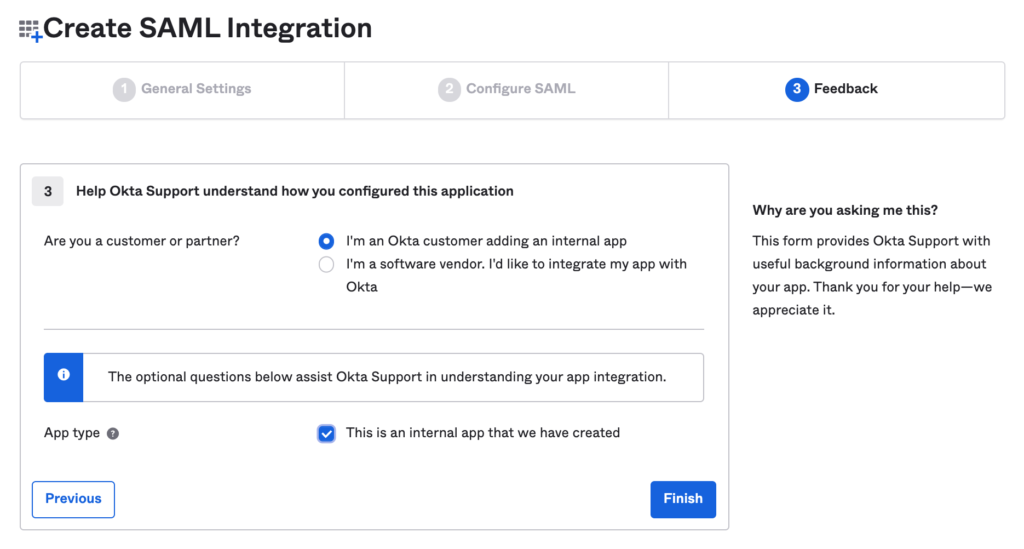
Click Next and Select “Internal App” then Finish
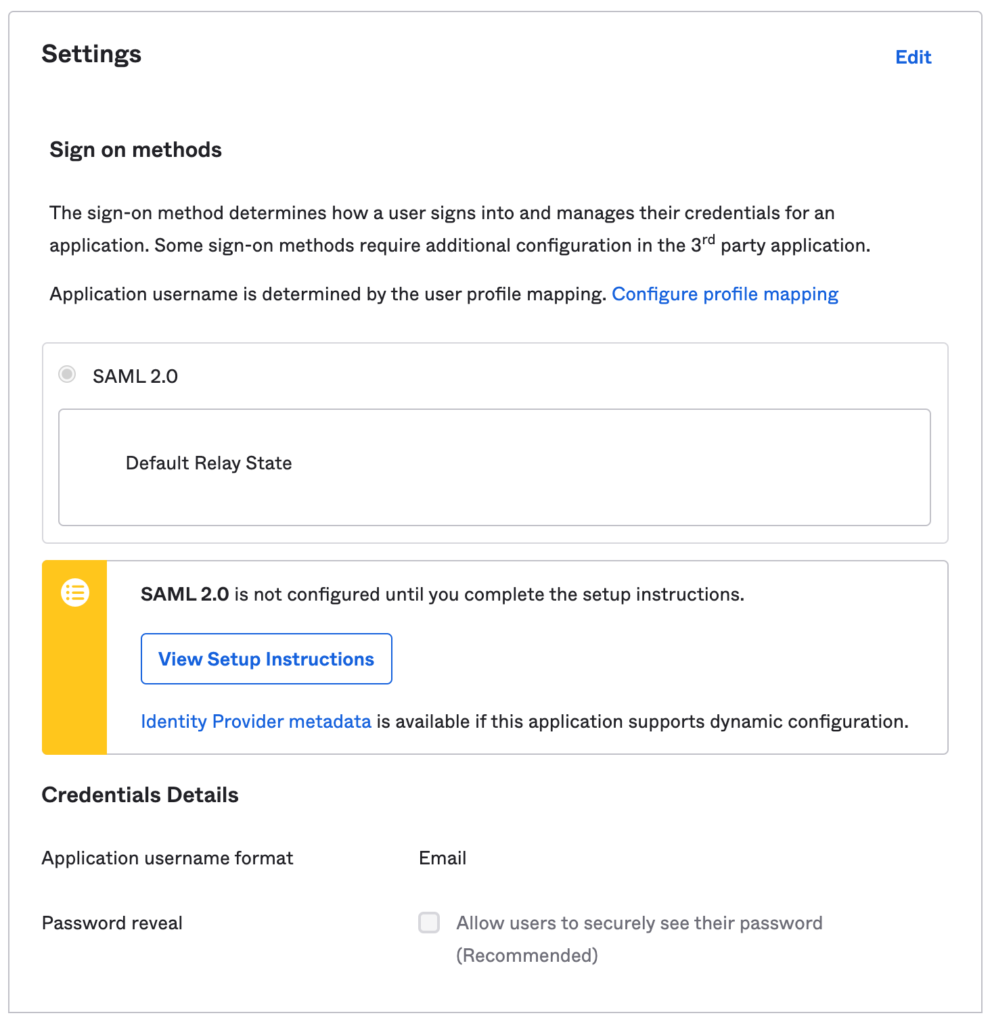
Step 3: Export the SAML 2.0 IdP metadata
- Click Next – Configure the Sign On settings
Two options available: View Setup Instructions which steps through the SAML config or Identity Provider metadata will produce an XML that can be loaded into Aruba Central.
Suggestion: Click Identity Provider metadata and save the XML data to a file.
- Click Next
- Select Internal app and Click Finish
Step 4: Create SAML Authorization Profile in Aruba Central
- Log into Aruba Central – Account Home > Click Single Sign On
- Create a new SAMPL profile – Enter the customer domain name and Click Add SAML Profile
-Before you can add a new SAML profile, you must have at least one local user account with that domain.
- Enter the metadata from the above step
Suggestion use Metadata file – select and import the XML
Manual Settings are also supported – copy and paste the info from the previous step
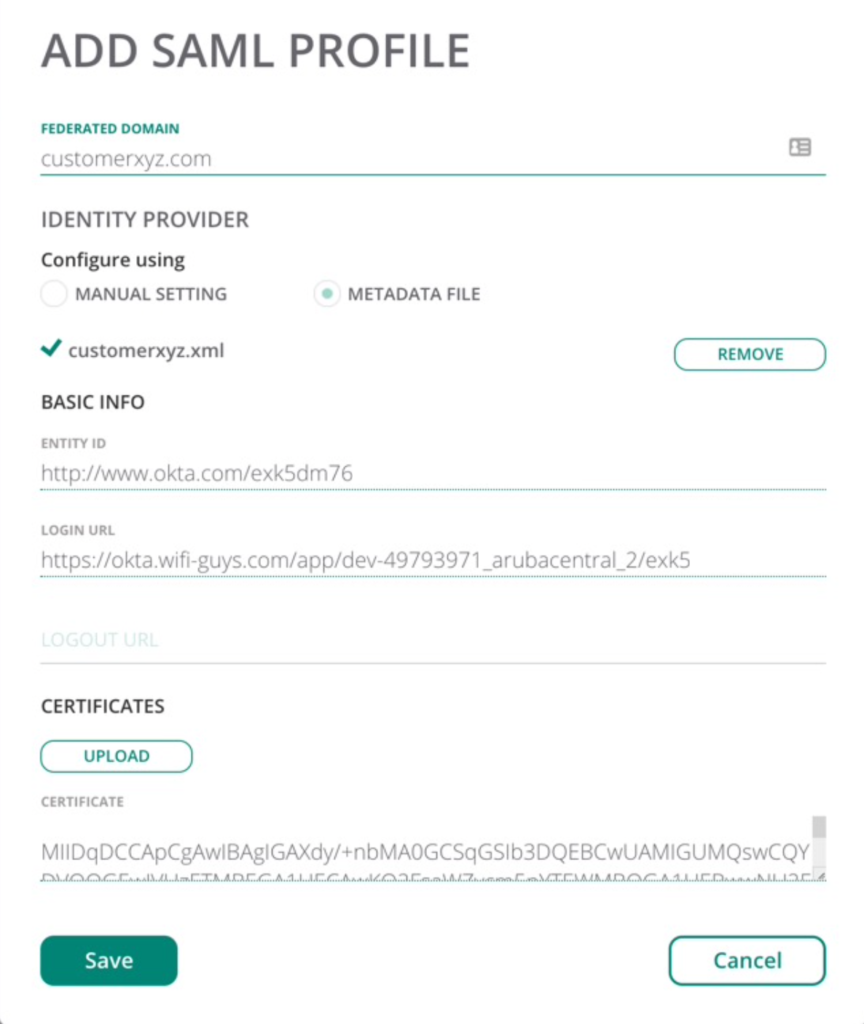
- Click Save
Testing and Troubleshooting:
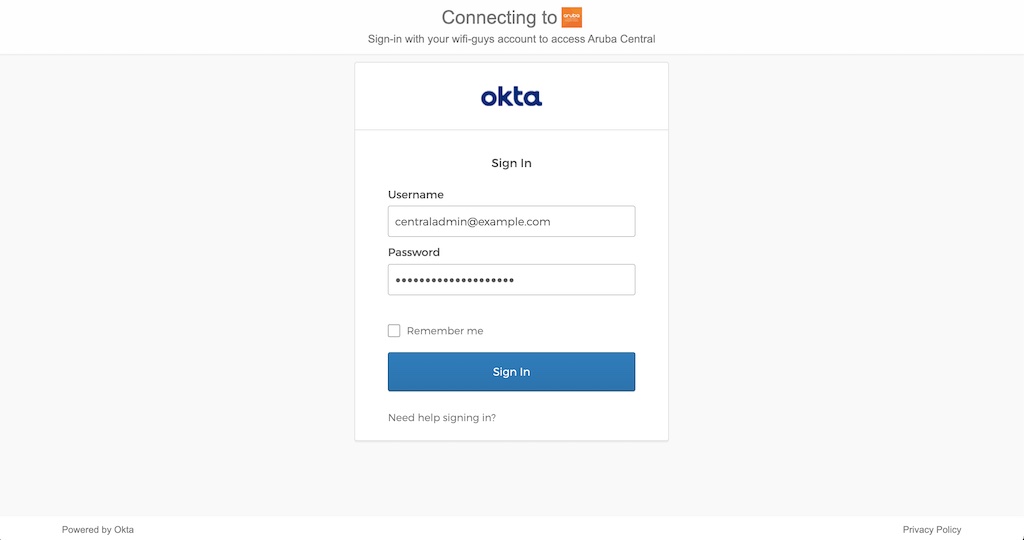
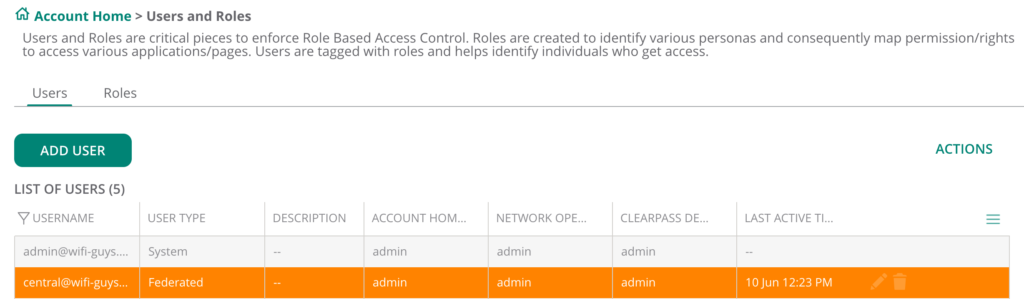
Attempt to log into Aruba Central – once you enter an email with the domain, you will be redirected to the SSO provider. Once you authenticate you will be redirected back to Aruba Central with the proper permissions. You can verify this by clicking under Aruba Central Home > Users and Roles > then verify the user type is Federated and the account permissions.
Additional Notes:
- There must be at least one verified user belonging to the domain in the system users’ list.
- Each domain can have only one federation
- The SAML authorization profile configuration feature is available only for the admin users of an Aruba Central account. Aruba Central allows only MSP admin users to configure SAML authorization profiles for their respective tenant accounts.
- SAML user access is determined by the role attribute included in the SAML token provided by the IdP.
- SAML users with admin privileges can configure system users in Aruba Central.
- SAML users can initiate a Single Sign On request by trying to log in to Aruba Central (SP-initiated login). However, SAML users cannot initiate a single logout request from Aruba Central.
- The following menu options in Aruba Central UI are not available for a SAML user. Enable MSP and Disable MSP—SAML users cannot enable or disable MSP deployment mode in Aruba Central. Change Password—Aruba Central does not support changing the password of a SAML user account.
- For more troubleshooting: https://help.central.arubanetworks.com/2.5.3/documentation/online_help/content/nms/user-mgmt/trblsht-saml.htm
Okta MFA Example:
- Okta as well as many cloud identity providers support various MFA and other types of additional security policies.
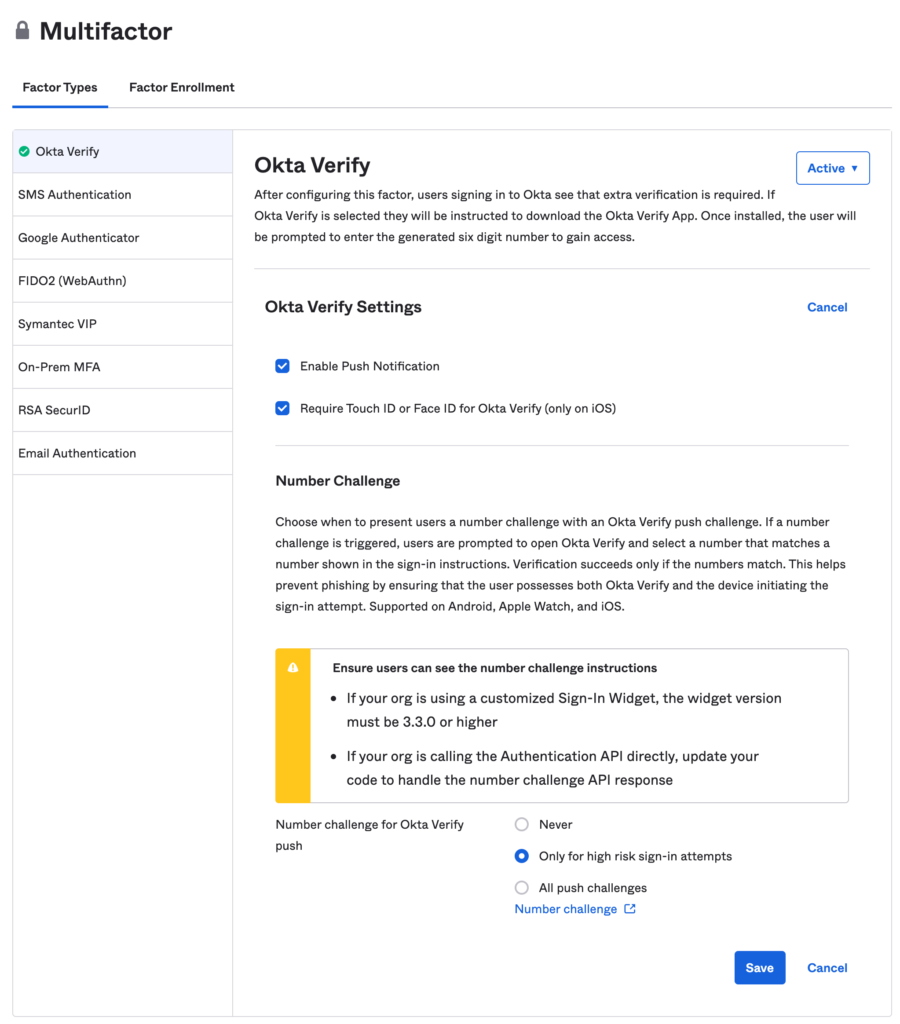
- Okta Verify (Okta native MFA app) example:
- Okta Admin portal > Security > MFA > Factor Type – Okta Verify Enable
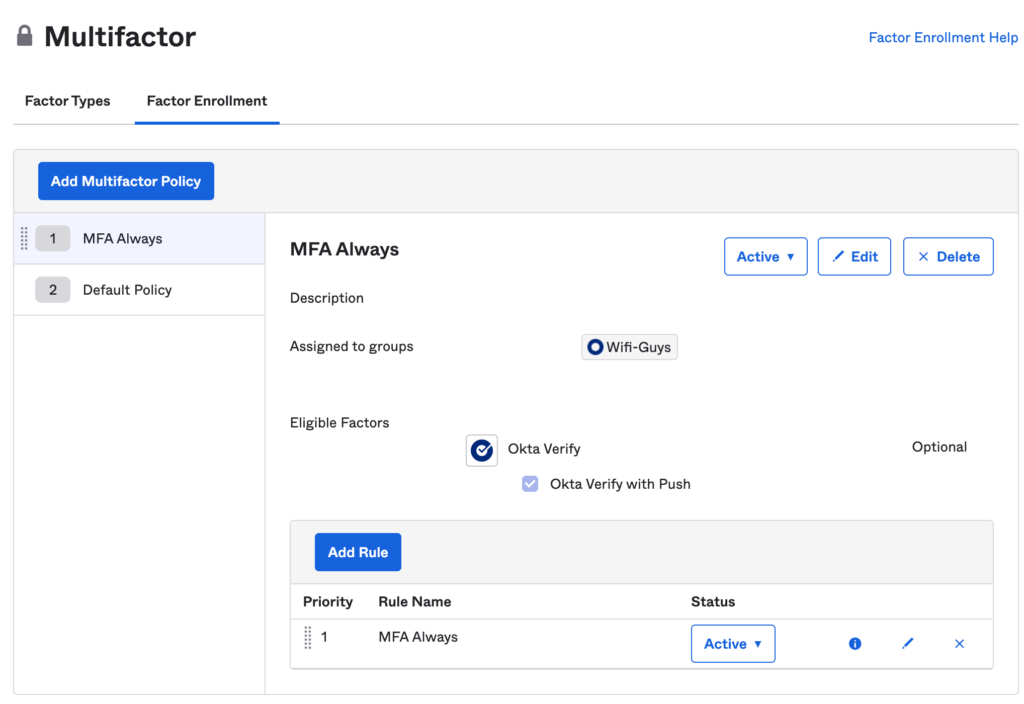
- Click Factor Enrollment and create an enrollment policy.
- Then select the user groups to apply this policy to.
- For MFA enable verify with push.
When the user attempts to log into Aruba Central they will be sent a challenge through the Okta app. If this is the first time, the user may be asked to enroll by installing the app and scanning a QR code. After that they should only receive the push MFA notification.
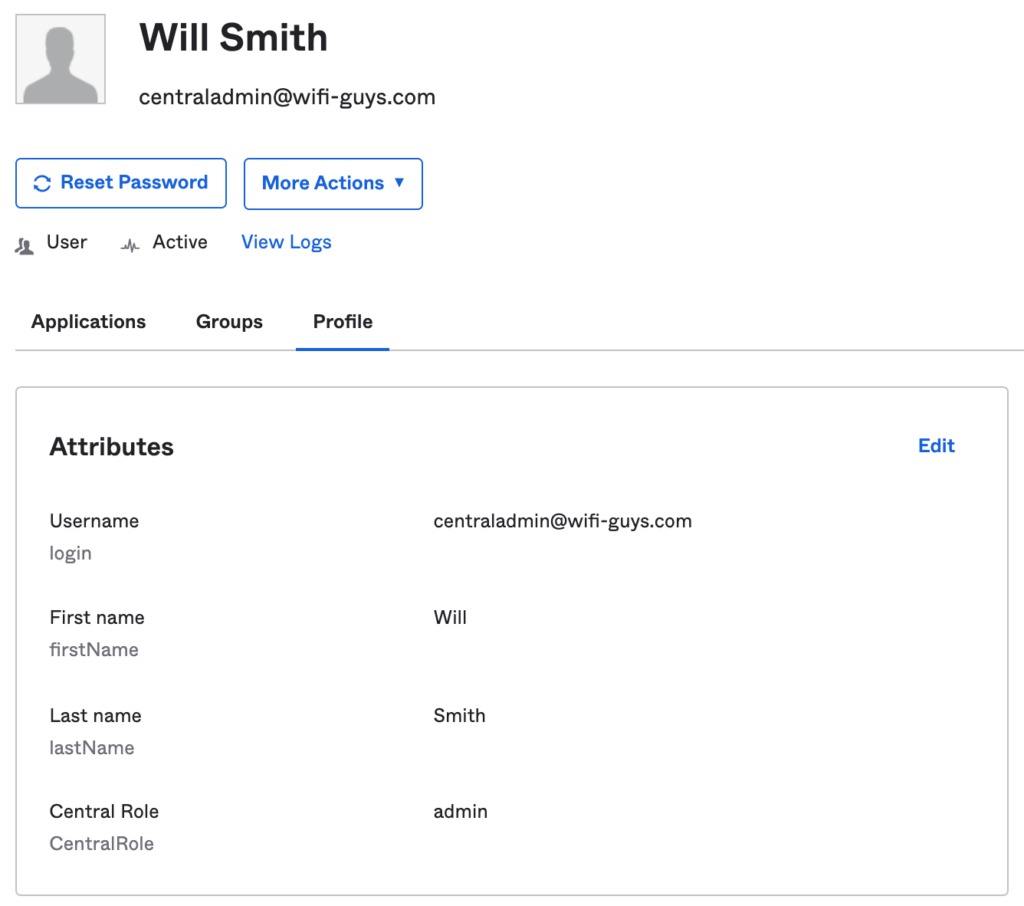
Okta Custom Attribute Example for Central:
- Okta and other cloud providers support custom attributes tied to the user’s profile. These are useful to provide role-based access control (RBAC) to Central.
- Common use-case is to allow admin access for network admins and read-only for helpdesk users.
- The example below show a custom attribute “CentralRole” which can be referenced by the application in the attribute statement using “user.CentralRole”.