Aruba Central has gone GREEN…GreenLake that is! If you’re reading this, then you’ve likely heard that Aruba Central is now integrated into the new HPE GreenLake Common Cloud Service (CCS) Platform. This allows IT admins to view and orchestrate critical network services such as Wired, Wireless and SD-Branch, through the same dashboard as their compute and storage infrastructure.
If you’ve already configured SSO with Aruba Central, then you don’t need to modify any of the existing SAML attributes. You can skip this post and follow the steps outlined in this support advisory. However, if you are new to Aruba Central or have never enabled SSO, this guide is for you. This will walk you through the process of configuring SSO for GreenLake and Aruba Central using Okta.
Before you Begin
Please review the GreenLake User Guide to understand how the SAML framework works in the context of Common Cloud Services for the Aruba Central application.
Steps to Configure SSO/SAML Application in Okta
To configure application metadata in Okta, complete the following steps:
- Step 1: Create an Okta SAML application
- Step 2: Configure Sign On settings
- Step 3: Export the SAML 2.0 IdP metadata
- Step 4: Configure the SAML connection in GreenLake
Step 1: Create an Okta SAML Application
- Log in to the Okta administration console.
- Click Applications > Create App Integration. The Create a new app integration window opens.
- Select SAML 2.0 and click Next.

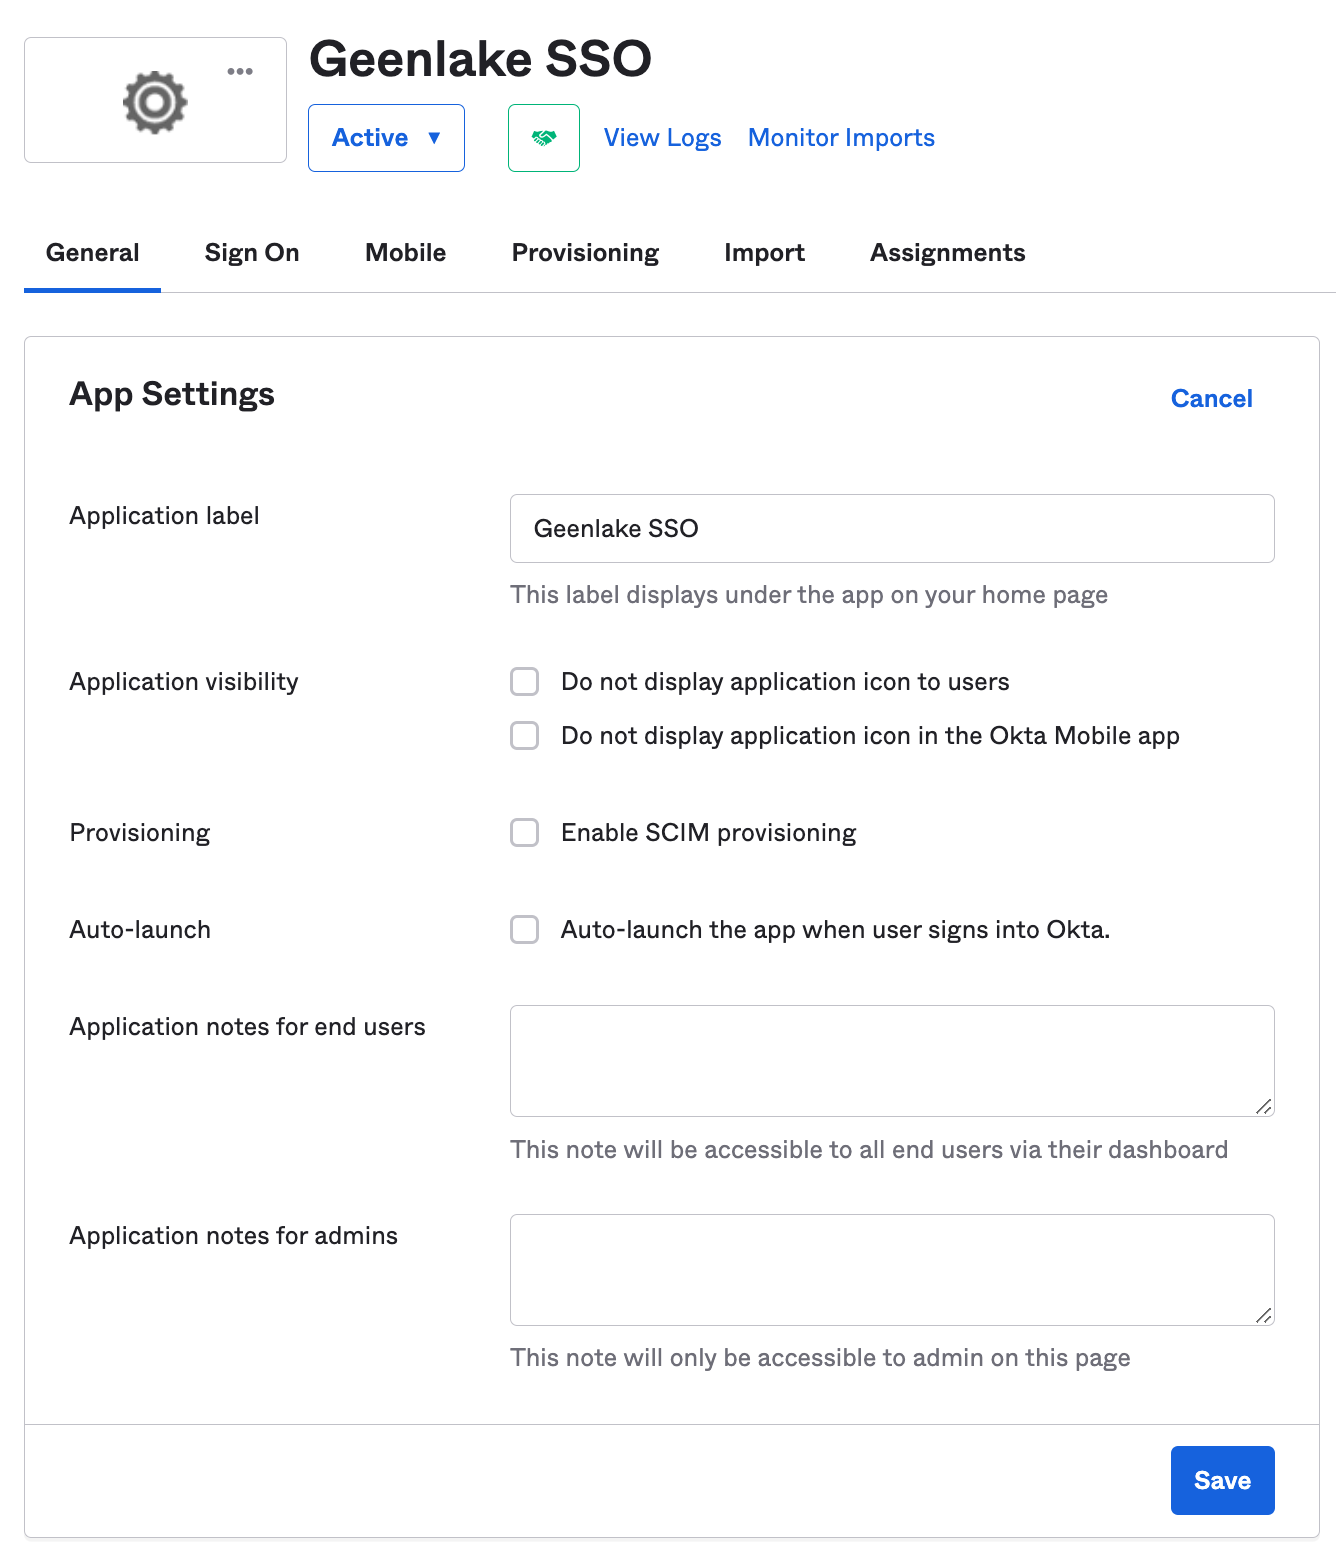
- Provide a name for the Aruba GreenLake SSO service (Okta Application)
Step 2: Configure Single Sign On settings
-
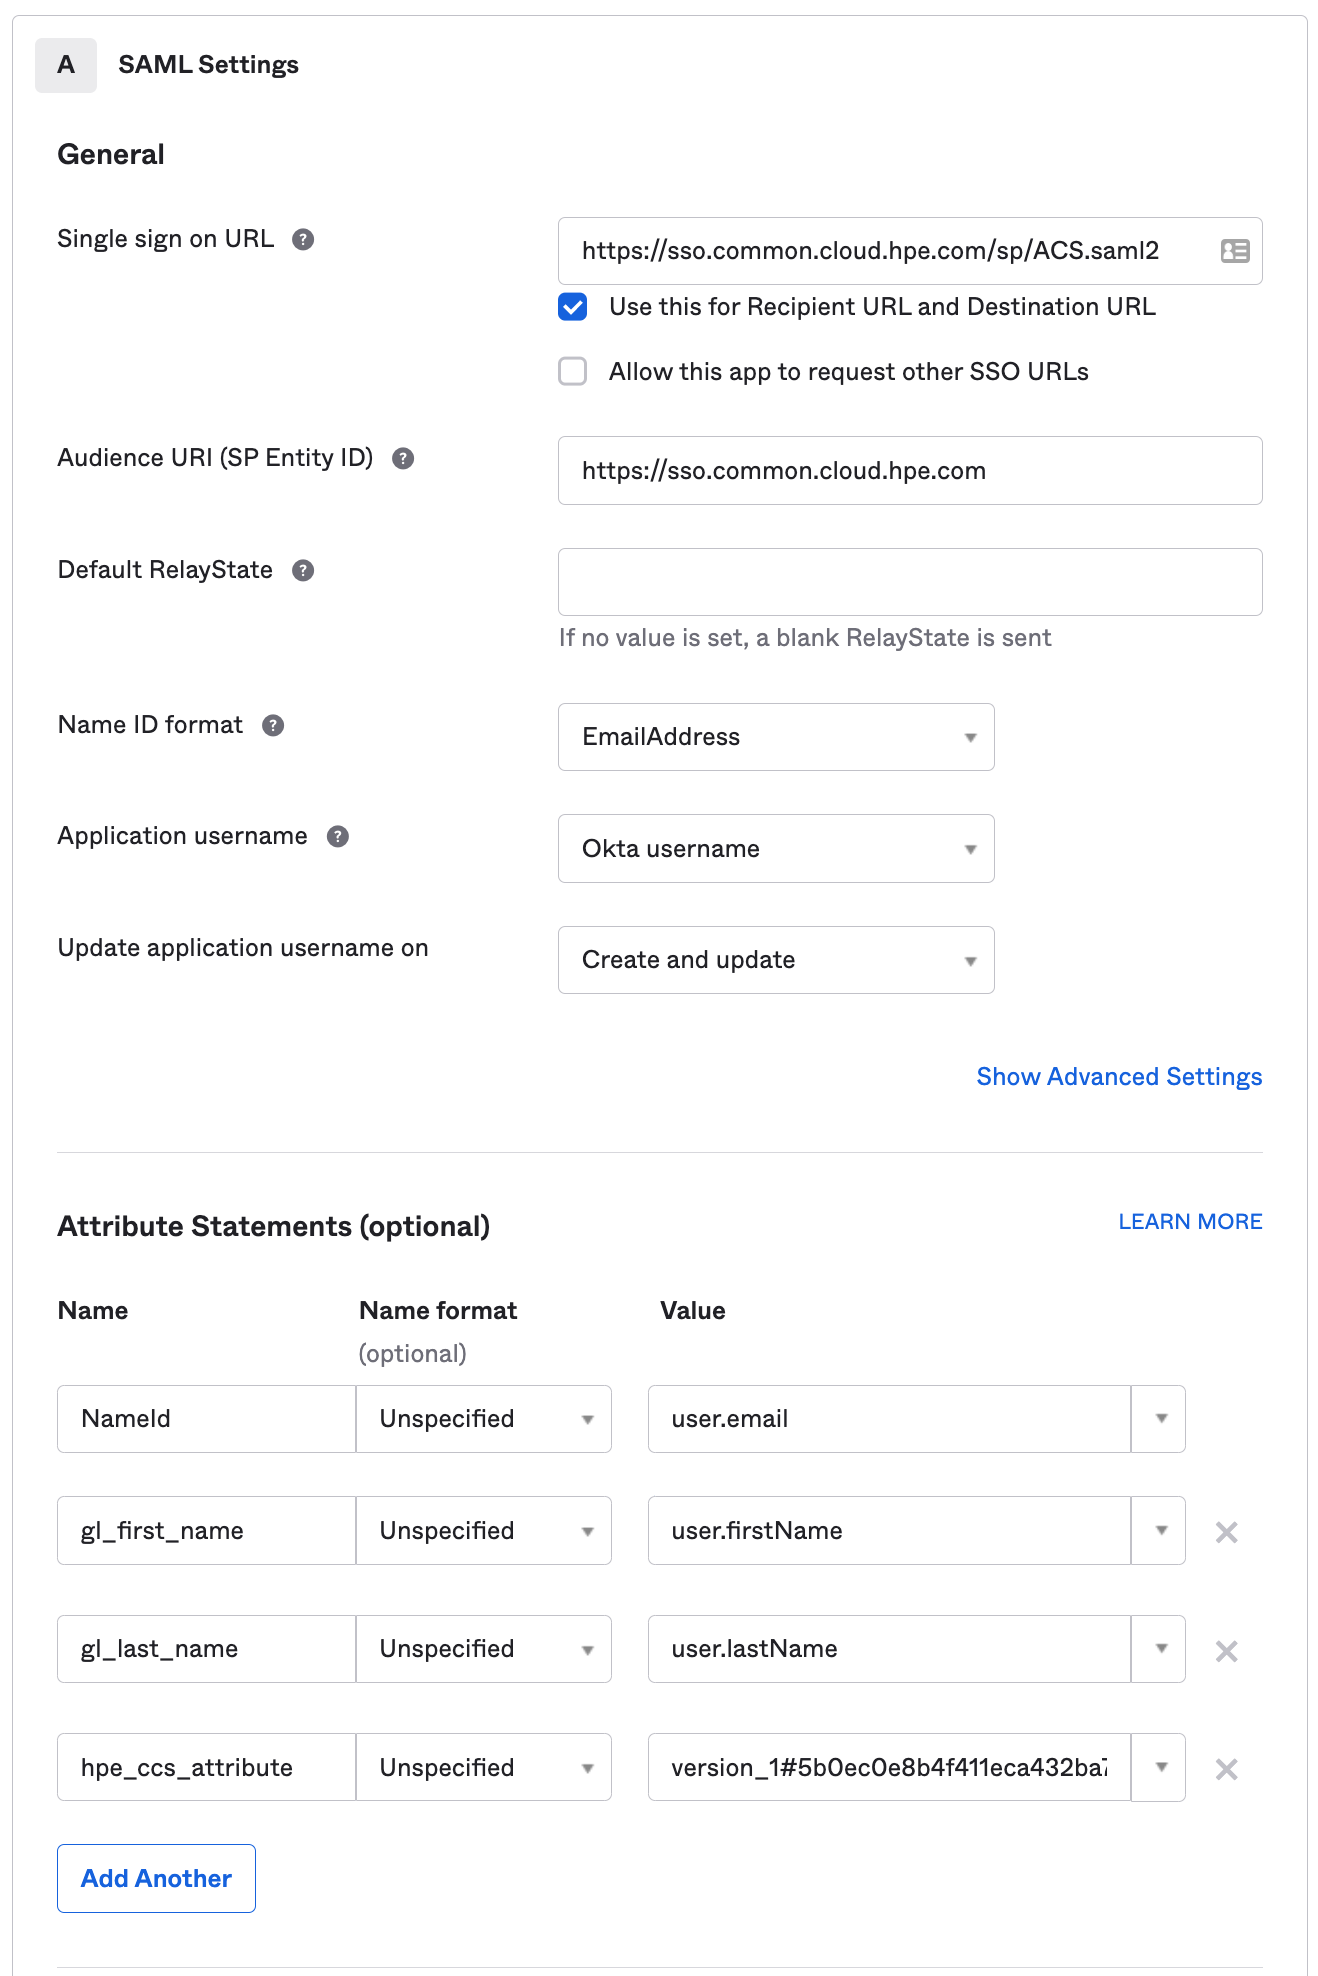
- Enter the SAML information.
Under General:
Single Sign on URL: https://sso.common.cloud.hpe.com/sp/ACS.saml2
Audience URI (SP Entity ID): https://sso.common.cloud.hpe.com
Name ID format EmailAddress
Application username Email
NameID = user.email
gl_first_name = user.FirstName
gl_last_name = user.LastName
hpe_ccs_attribute = (See Below)
See here for IdP attribute details: https://support.hpe.com/hpesc/public/docDisplay?docId=a00120892en_us
One of the additional features added as part of the GreenLake CCS is Role Based Access Controls (RBAC) for Aruba Central and all other apps in CCS. A new SAML attribute has been added “hpe_ccs_attribute” which tells GreenLake and Central the exact role/permissions for each user. The following describes how to format the attribute.
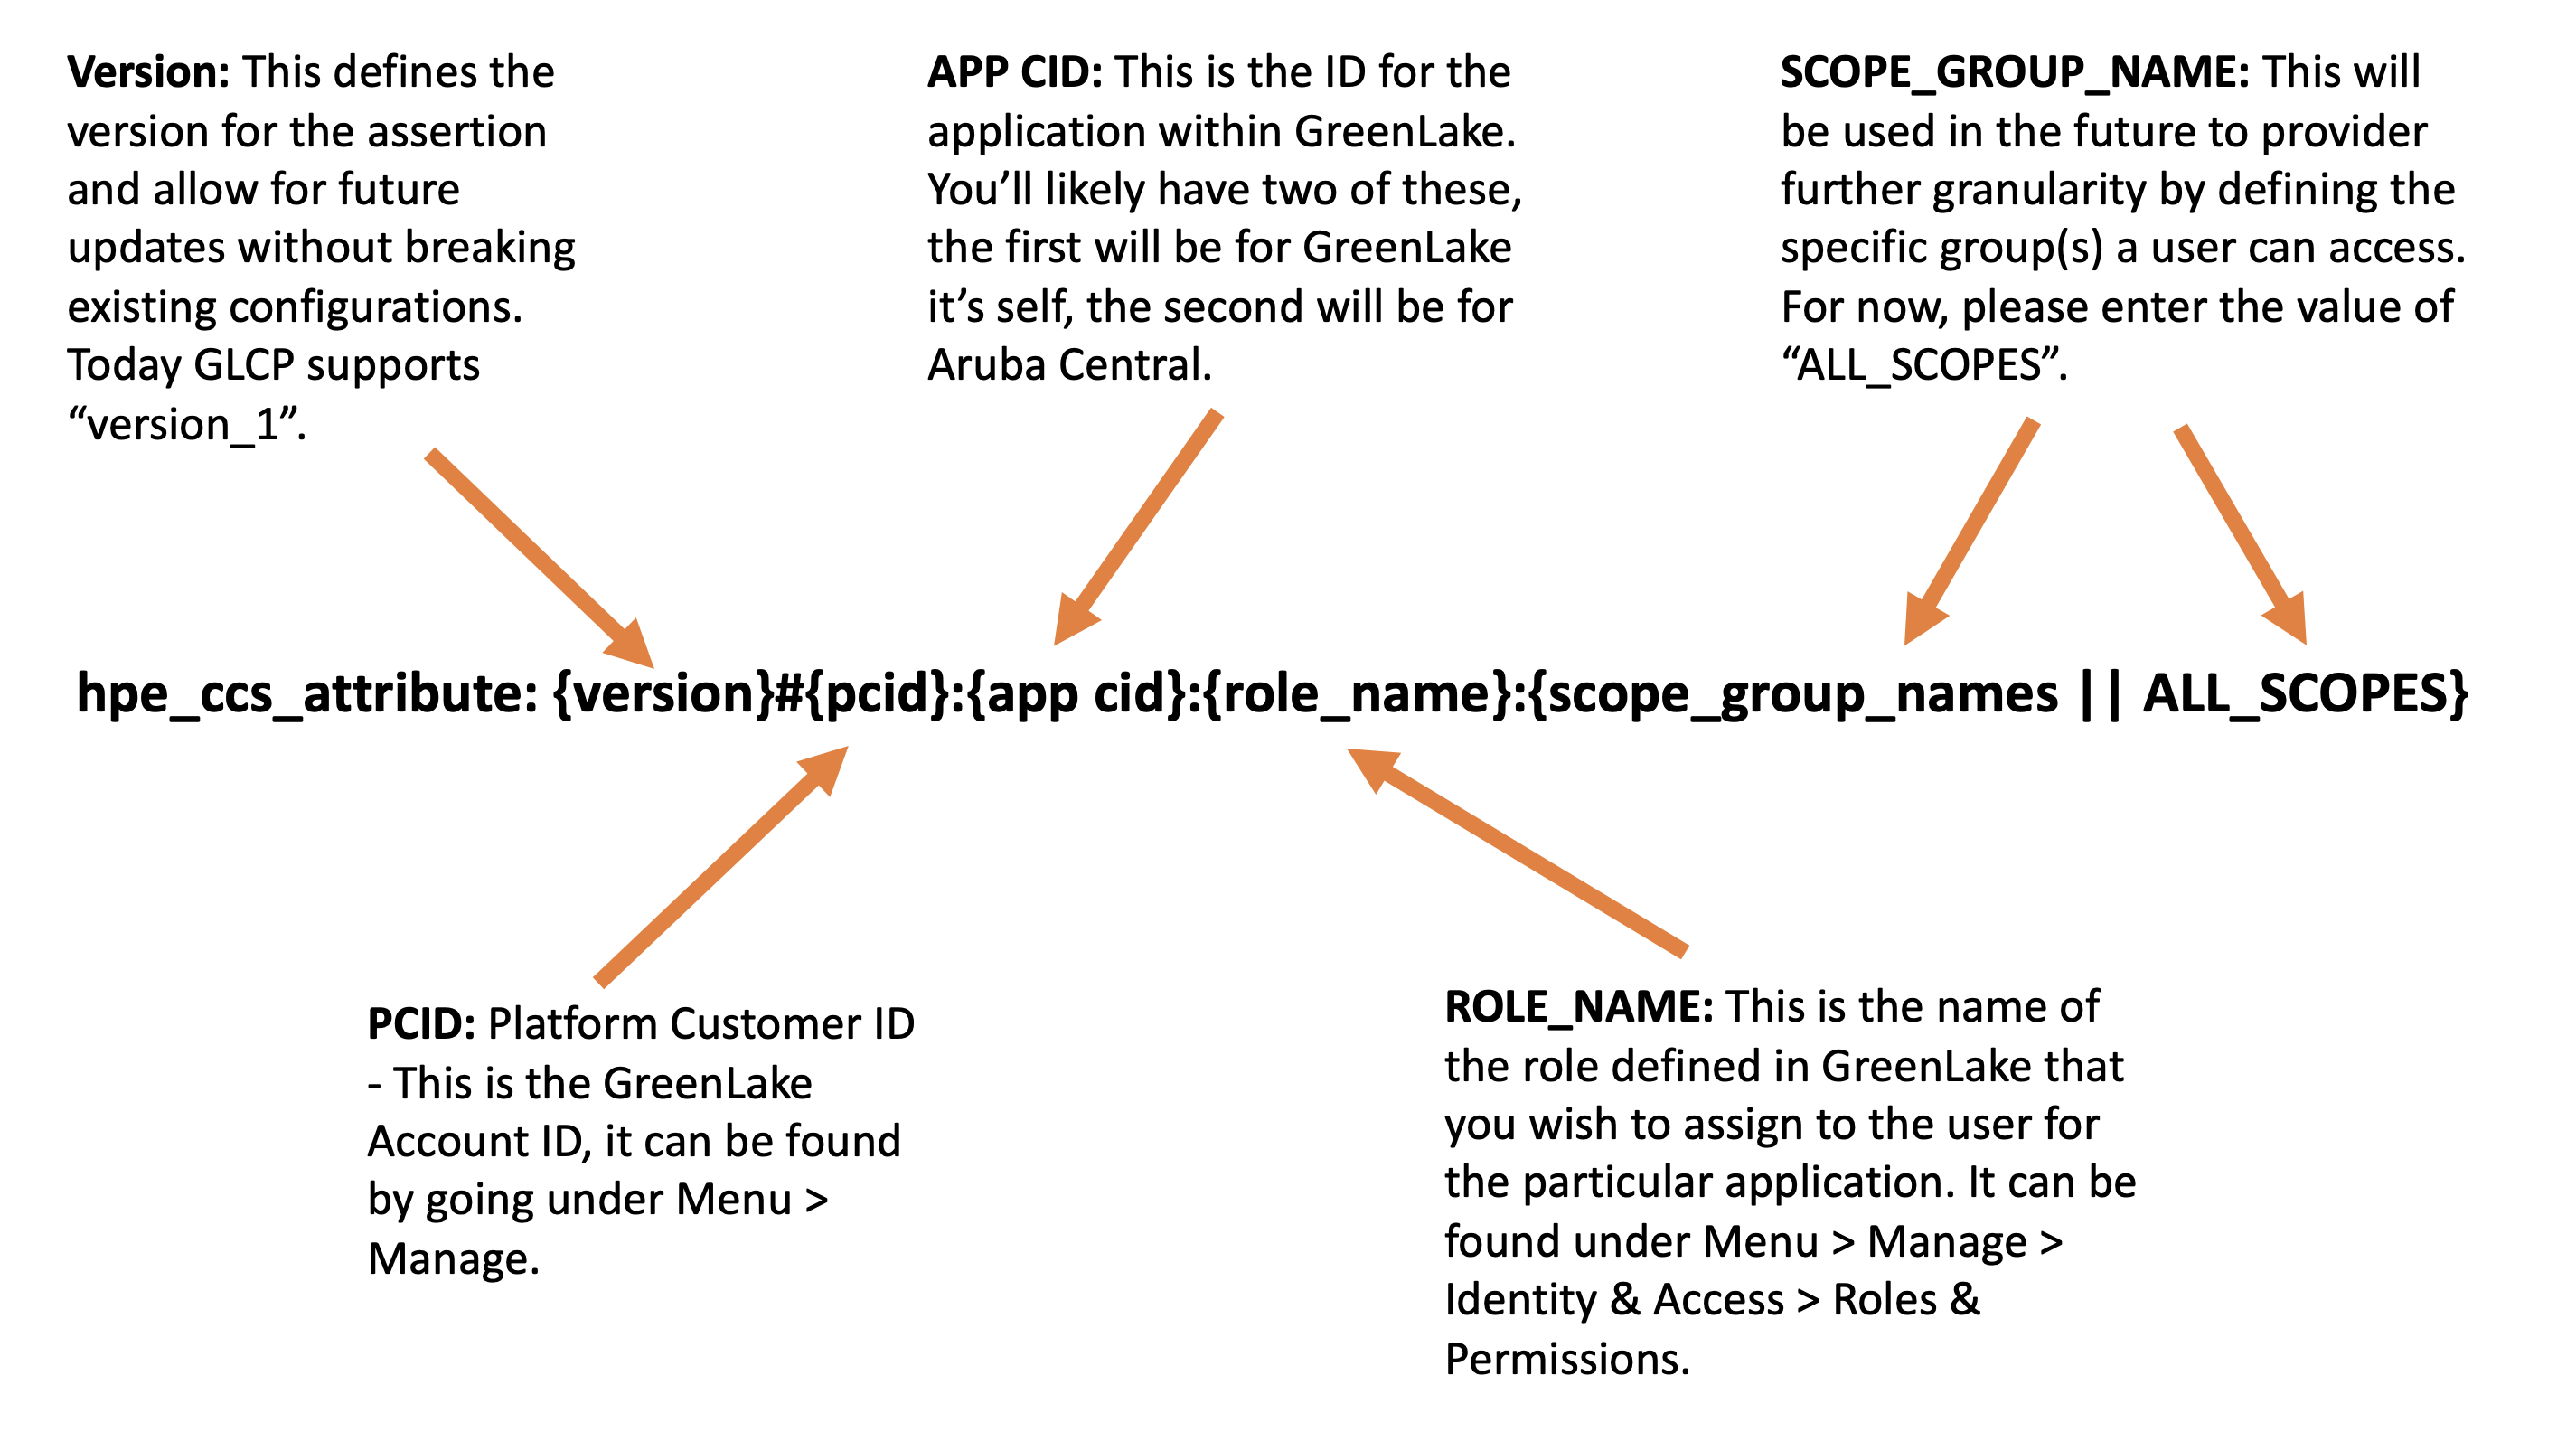
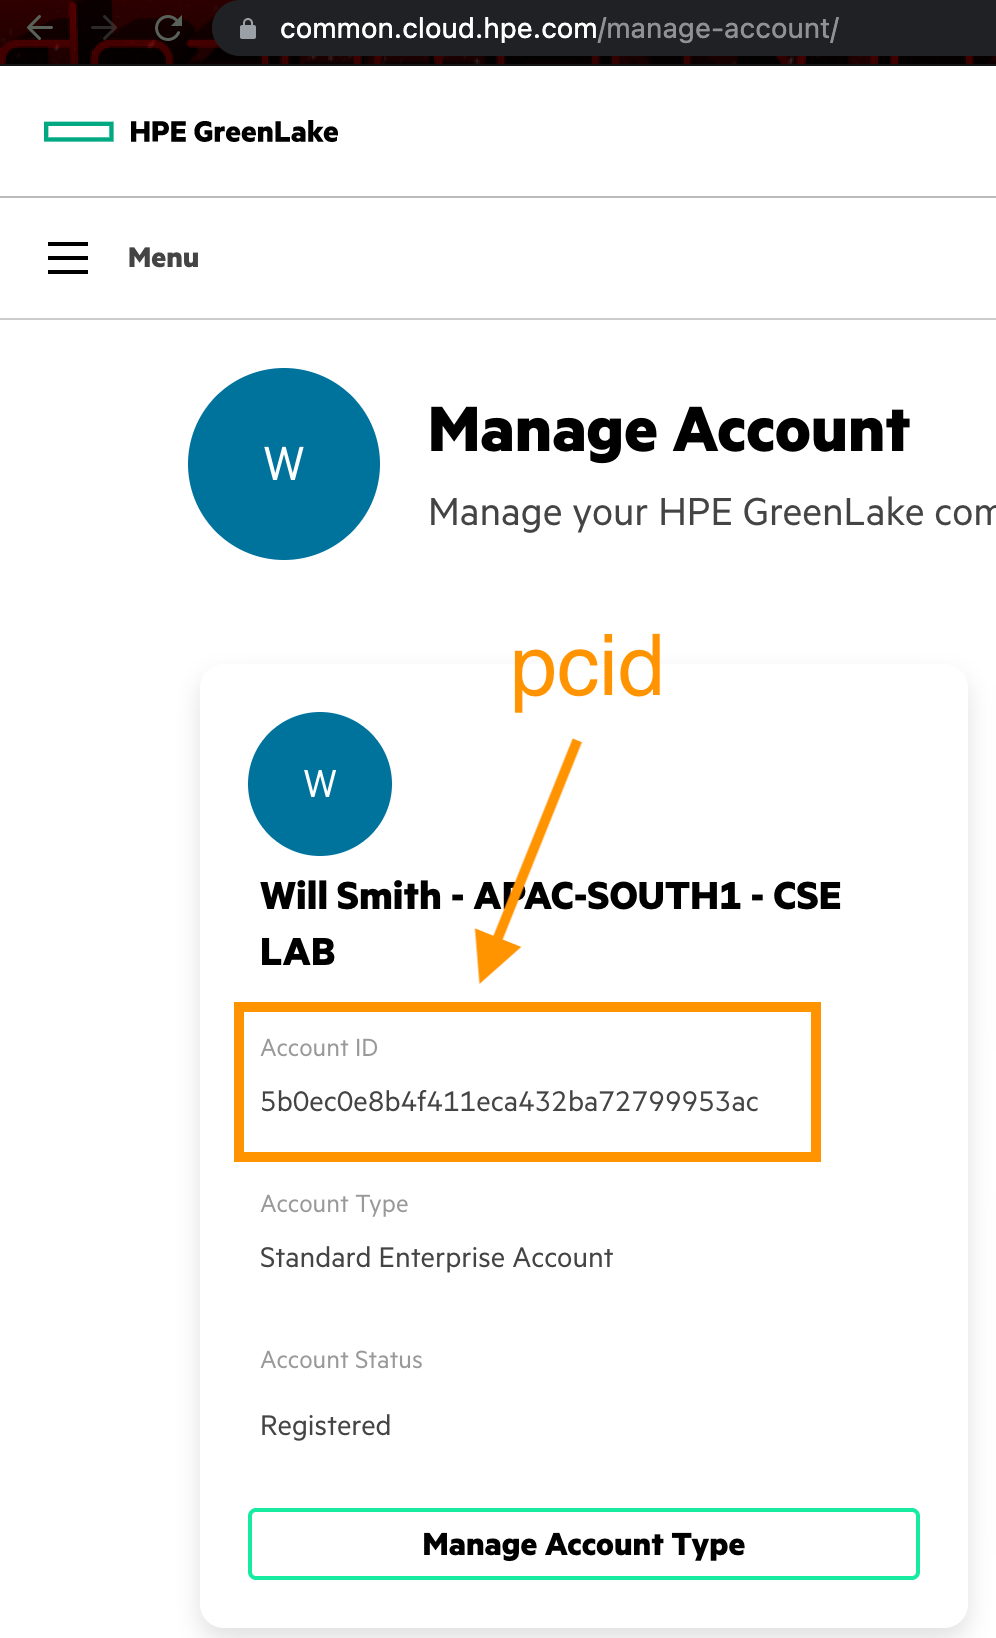
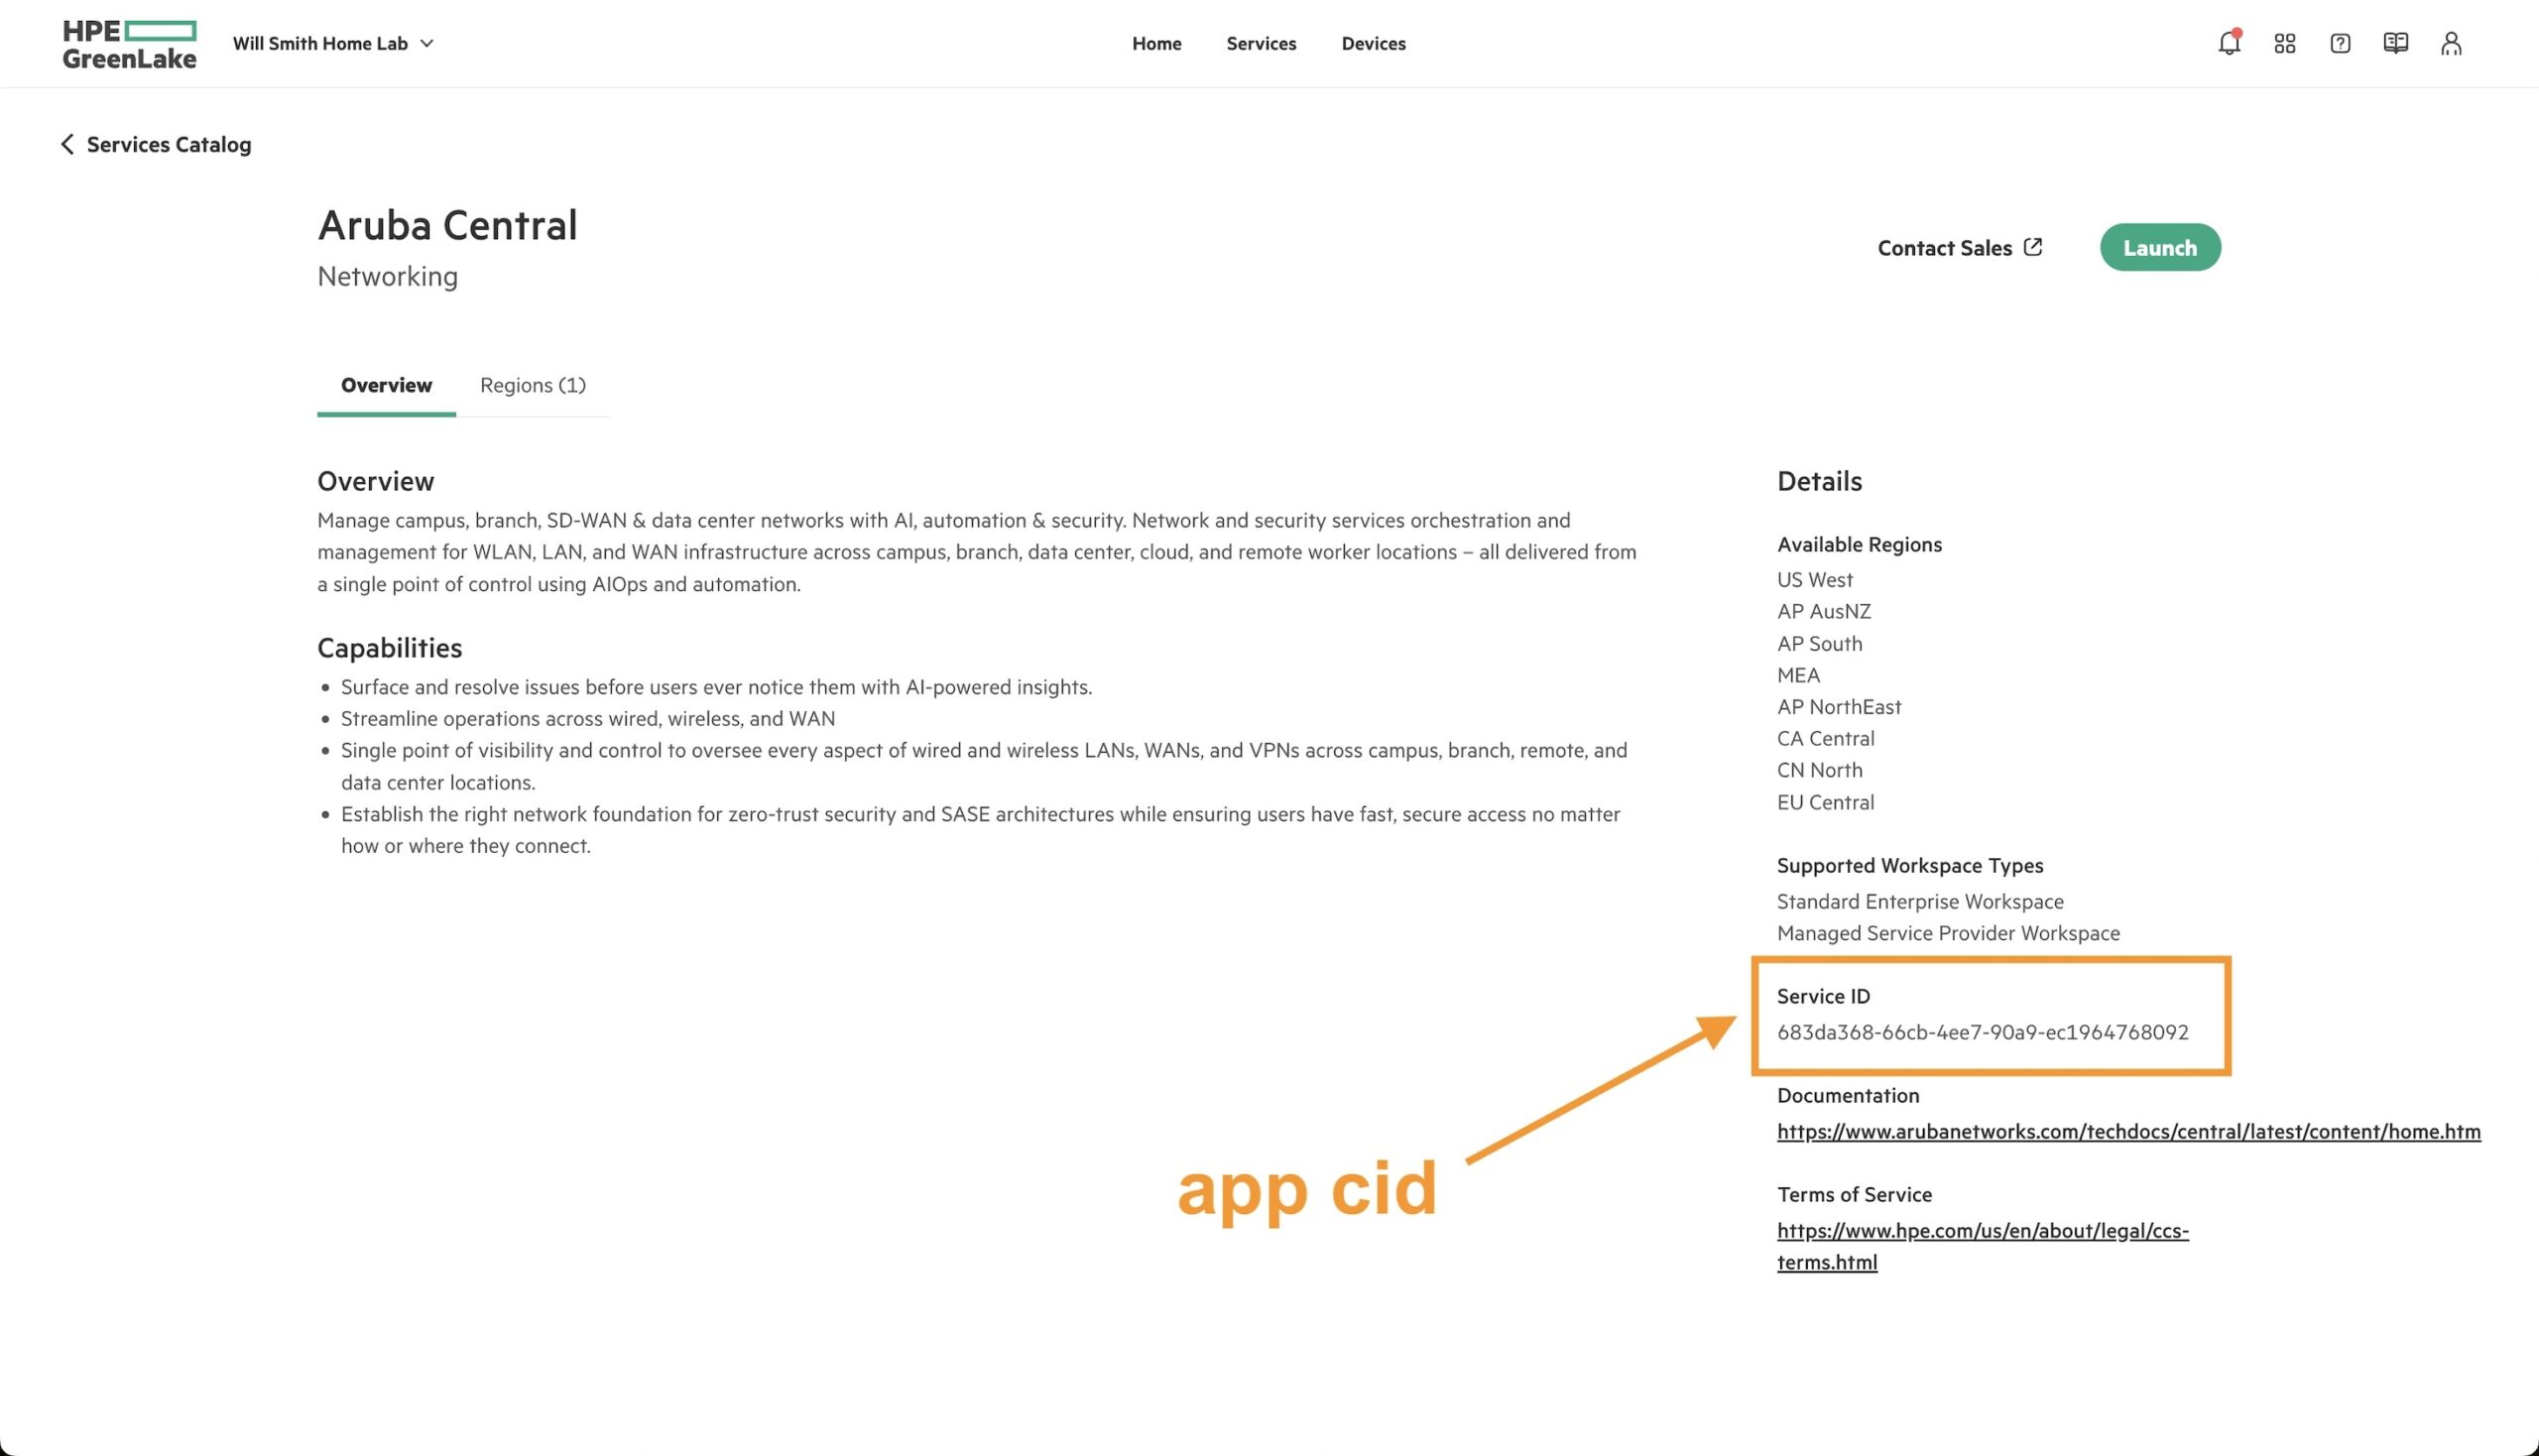
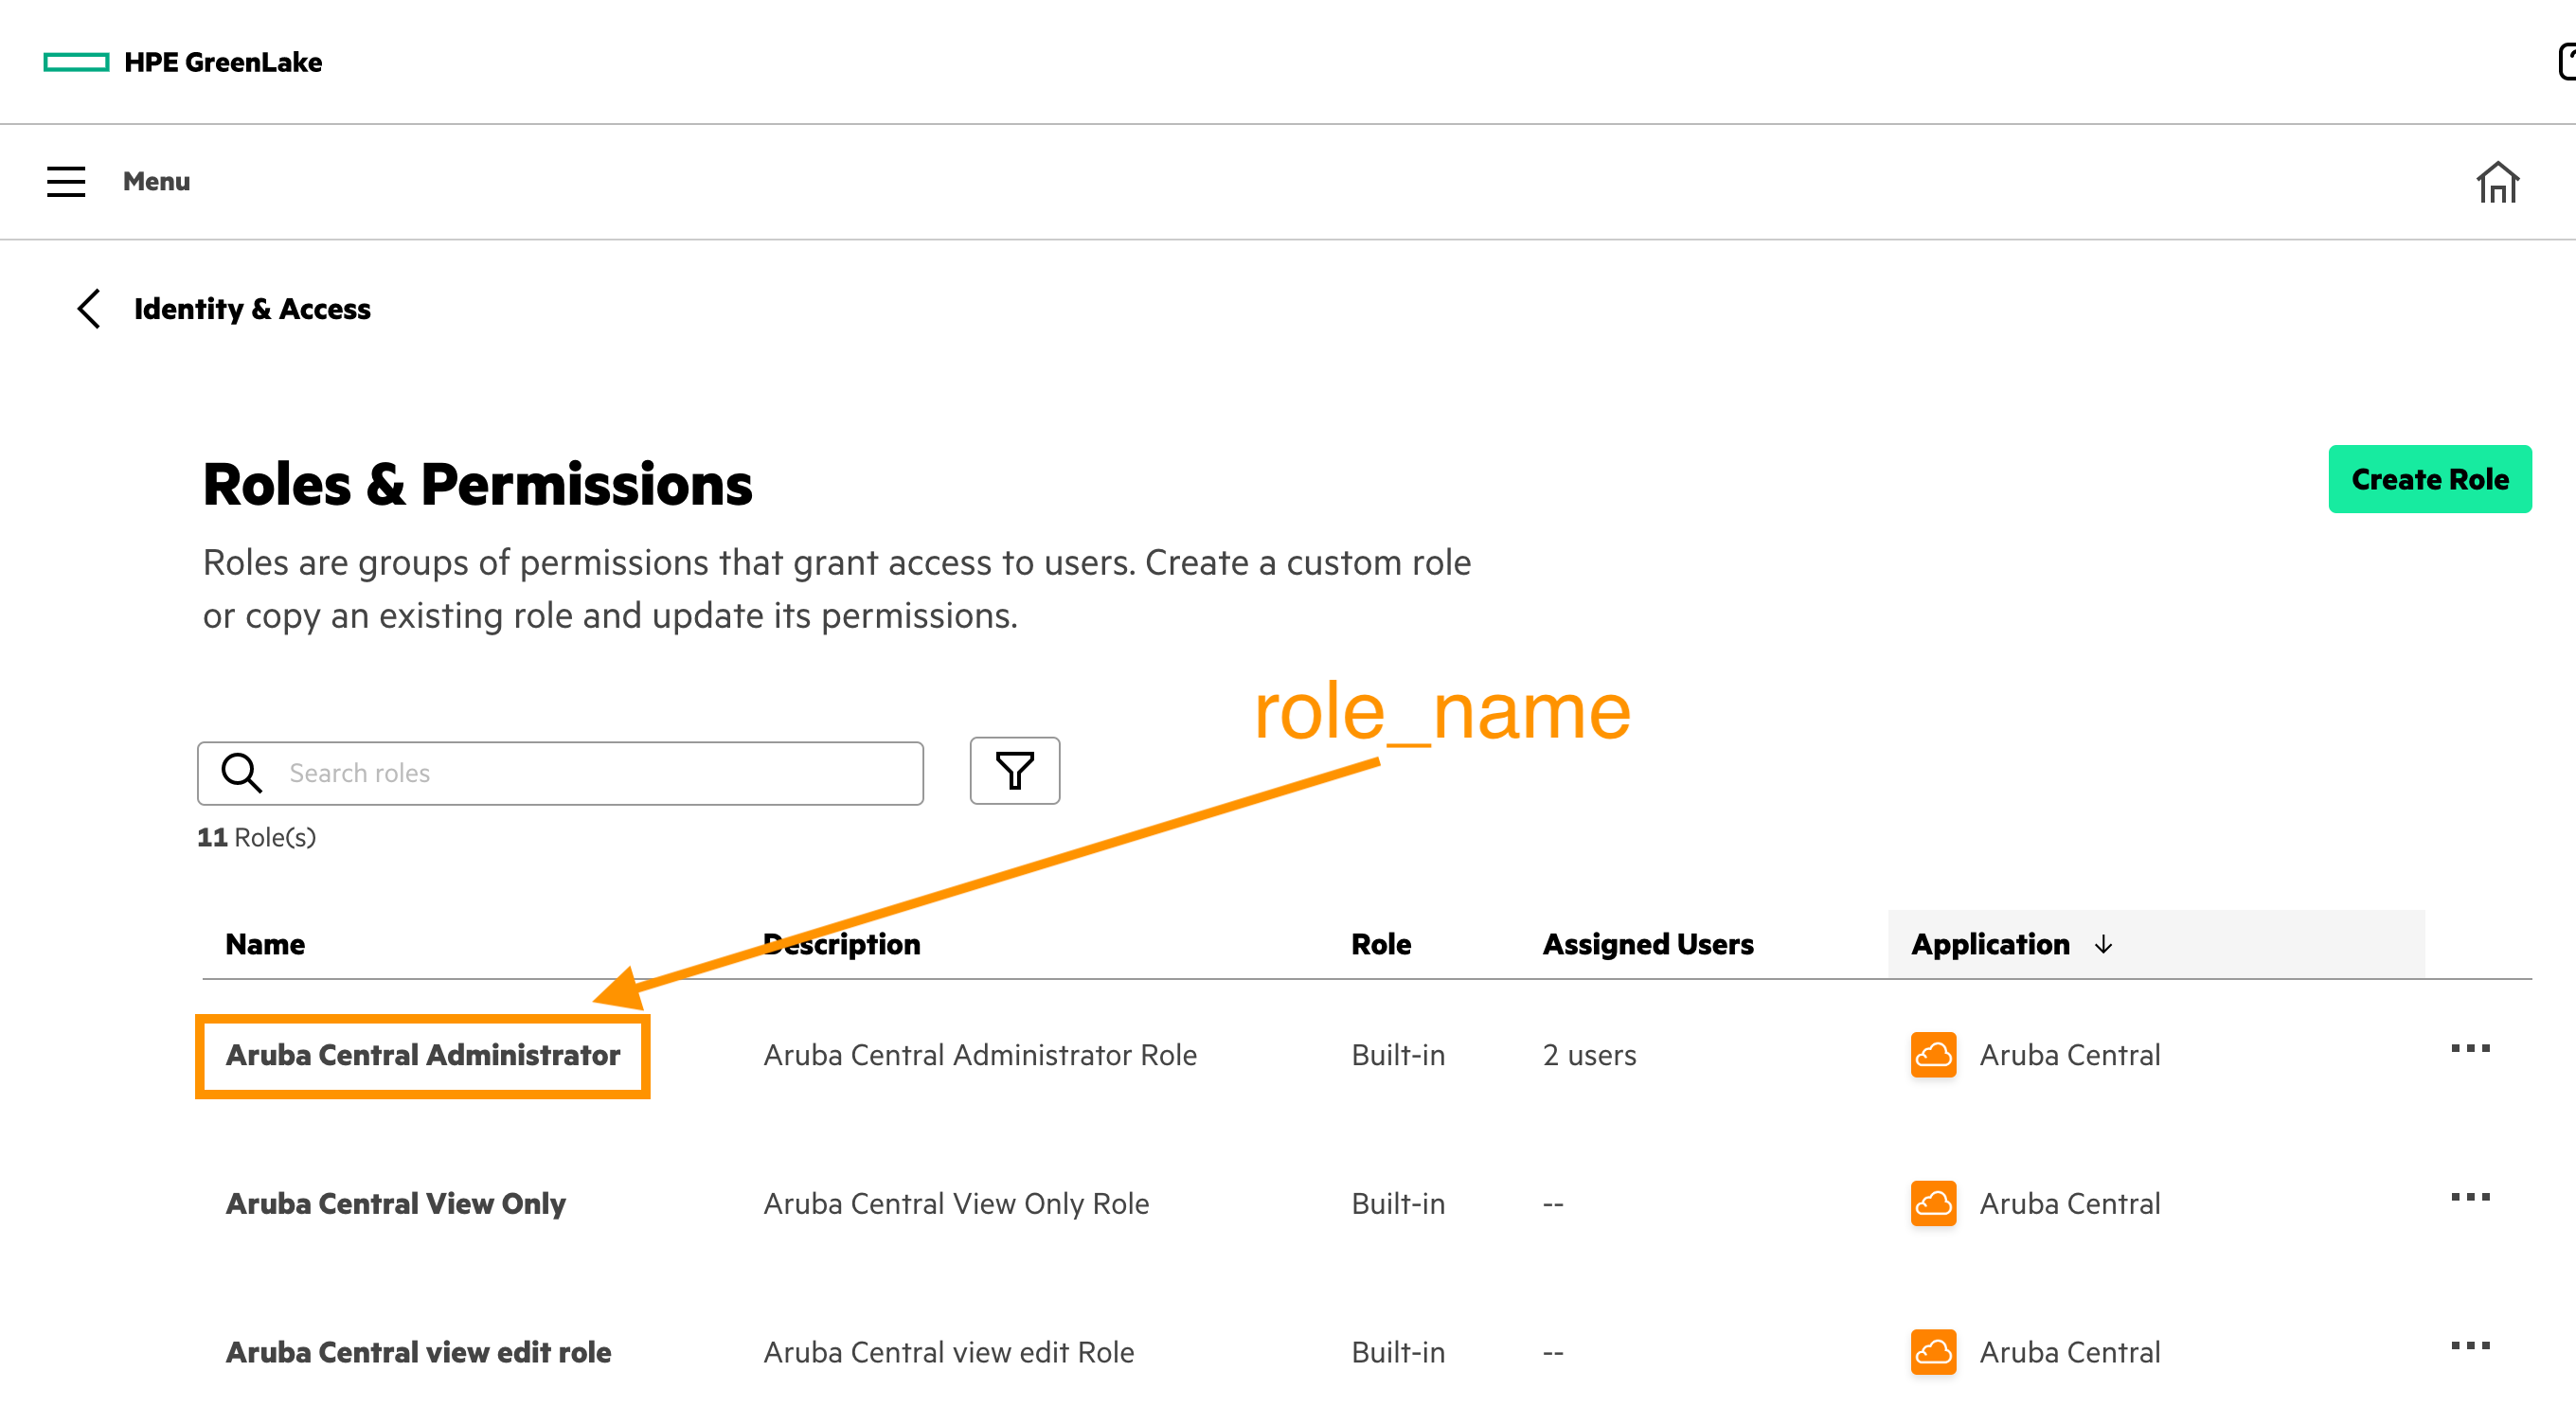
The “hpe_ccs_attribute” will always start with “version_1#”. First, we’ll configure the attributes for GreenLake CCS, then Central. First enter the PCID for the account, followed by the GreenLake application ID. This will always be “00000000-0000-0000-0000-000000000000”. Then followed by the role name and “ALL_SCOPES”. Next will be the Aruba Central info. Start with the “app cid”, then the role name (IE Aruba Central Administrator) then “ALL_SCOPES”.
Example: version_1#5b0ec0e8c4f422eca232ba72799953ac:00000000-0000-0000-0000-000000000000:Account Administrator:ALL_SCOPES:683da368-66cb-4ee7-90a9-ec1964768092:Aruba Central Administrator:ALL_SCOPES
If you want to add additional GreenLake applications or if you have multiple Aruba Central accounts, you can add them as well. Just follow the same syntax as before. Once you have the attribute defined, enter it into the SAML attribute statement in Okta as shown below.
- Complete the setup.
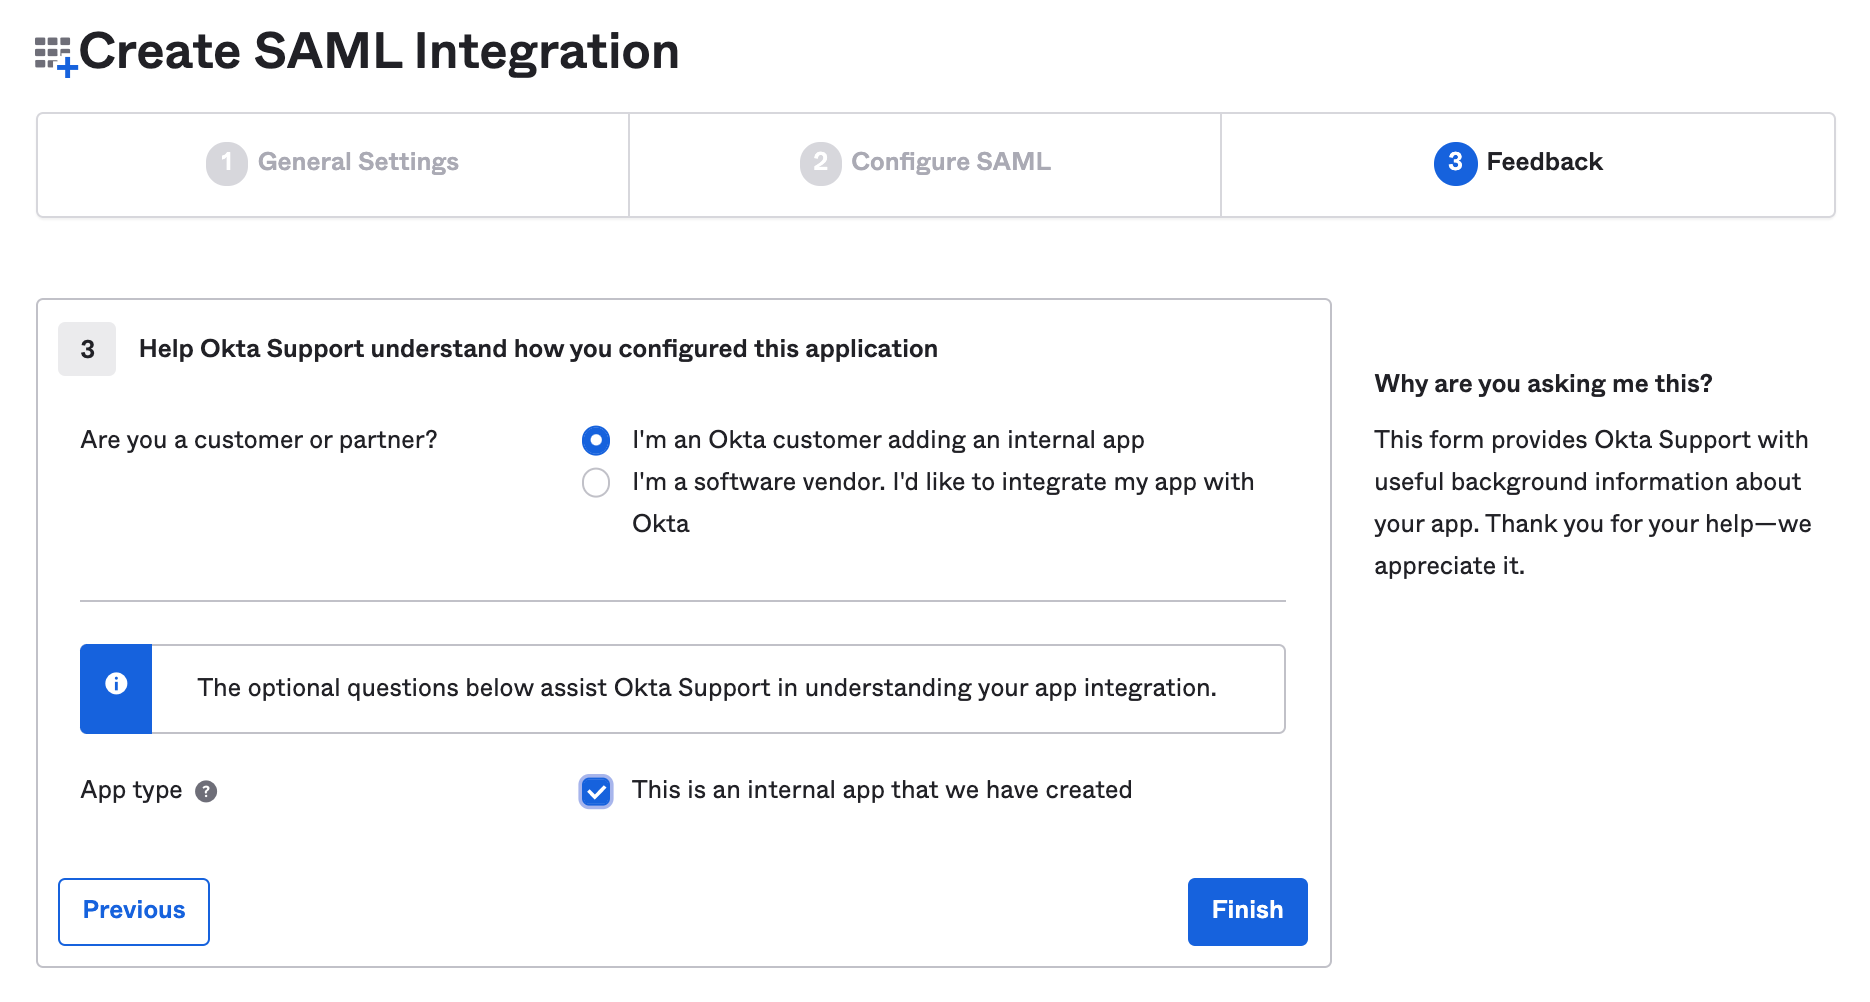
Click Next and Select “Internal App” then Finish
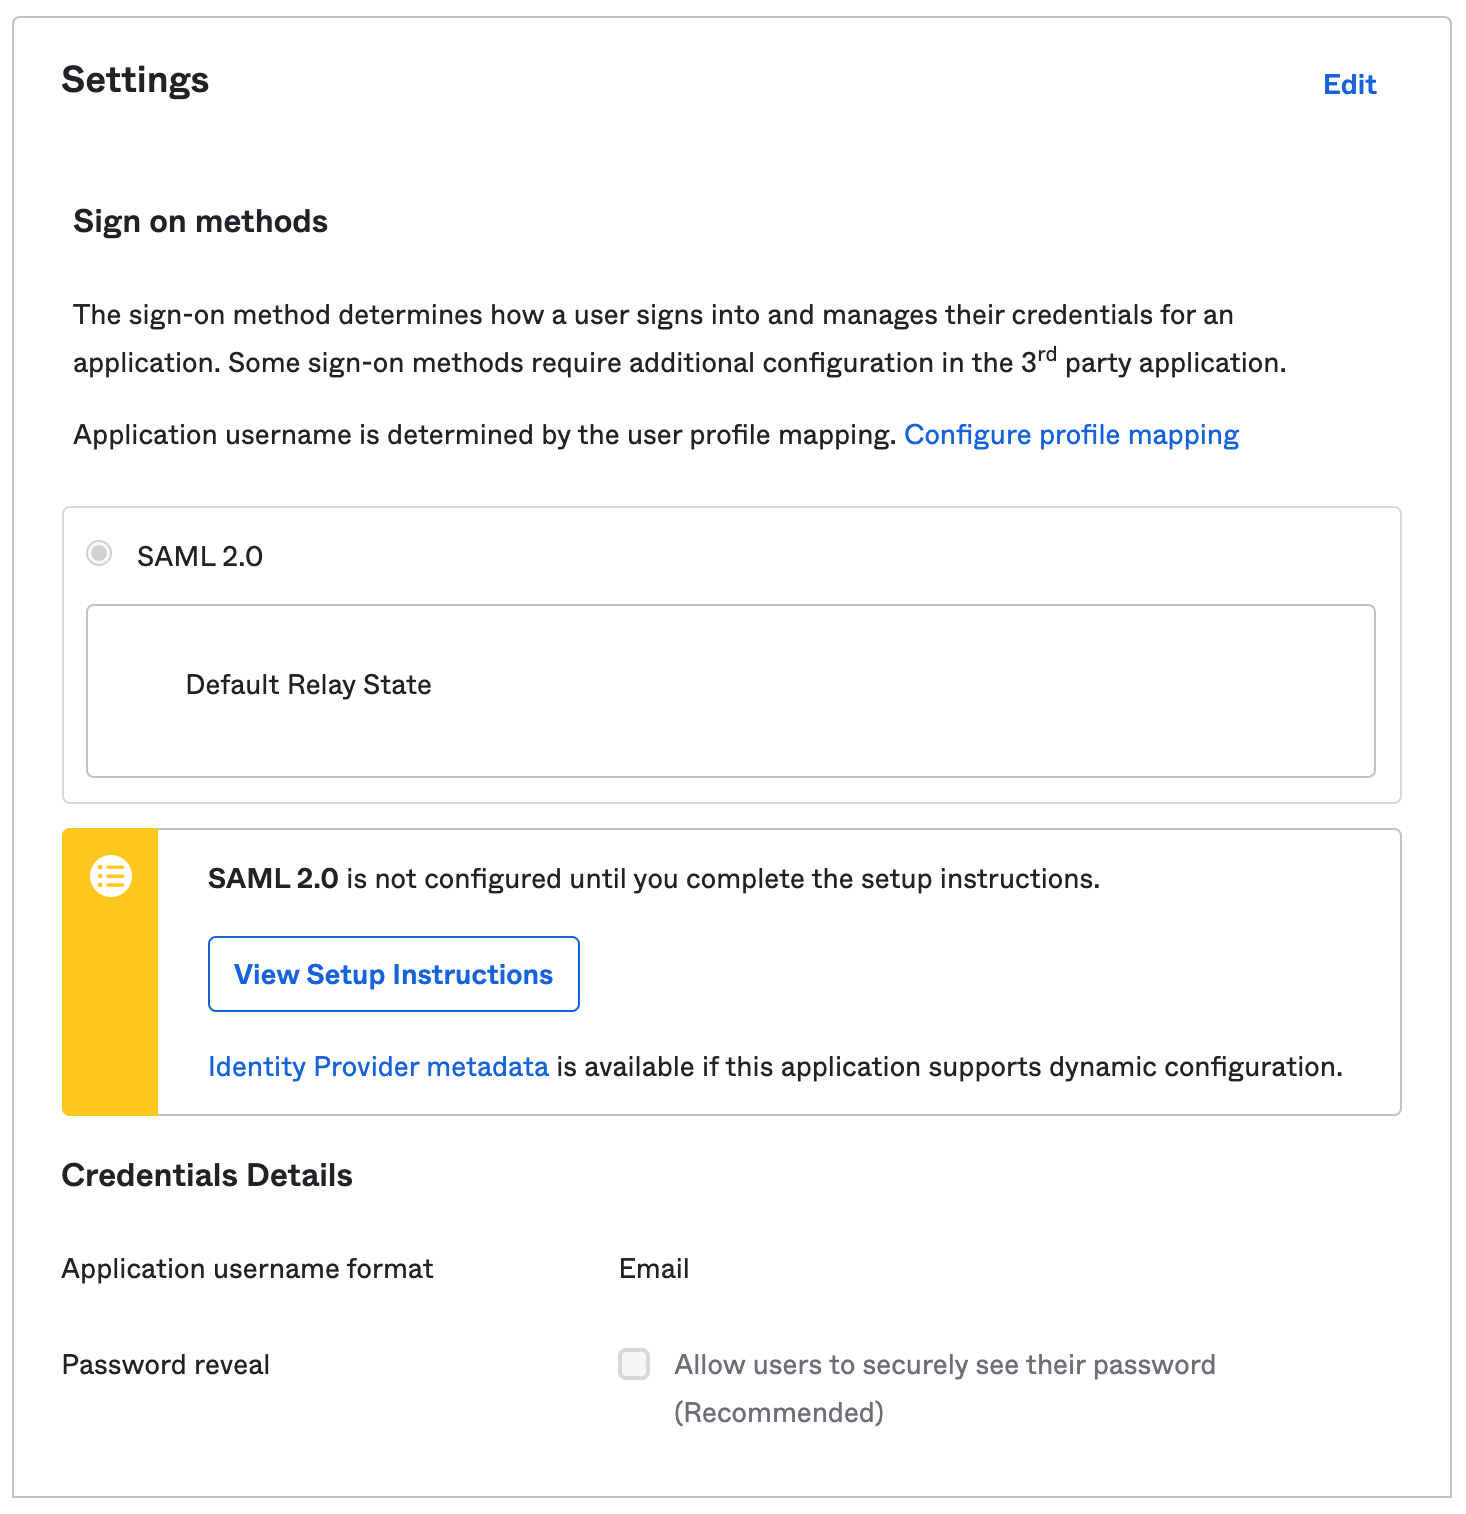
Step 3: Export the SAML 2.0 IdP metadata
-
- Click Next – Configure the Sign On settings
Two options available: View Setup Instructions which steps through the SAML config or Identity Provider metadata will produce an XML that can be loaded into Aruba Central.
Suggestion: Click Identity Provider metadata and save the XML data to a file.
- Click Next
- Select Internal app and Click Finish
Step 4: Create SAML Authorization Profile in GreenLake Cloud Platform
-
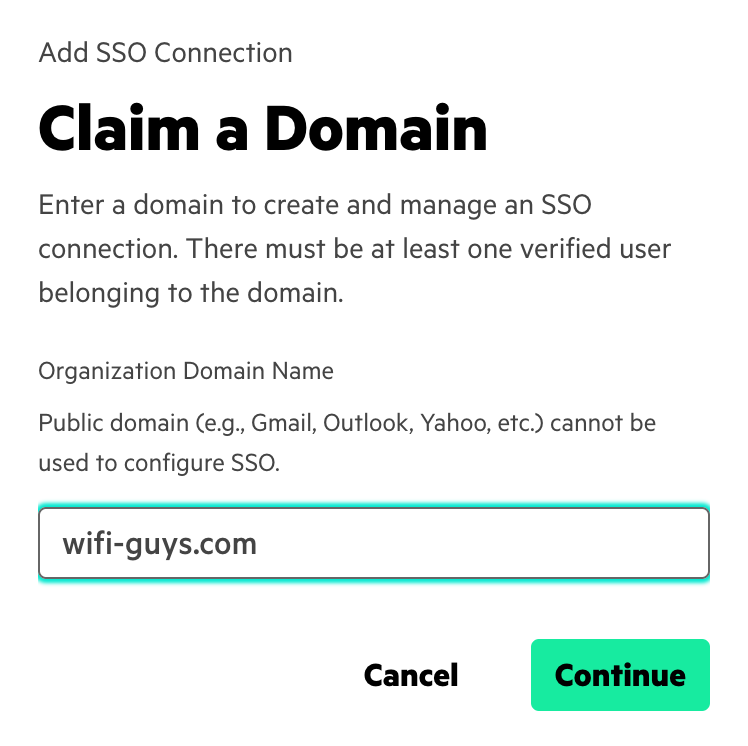
- Log into GreenLake and click Menu > Manage > Authentication and Click Set Up SAML Connection.
-Before you can add a new SAML configuration, you must have at least one user account with that domain already enabled in GreenLake. Also, you must be logged into GreenLake with an account from that domain in order to enable SSO for that domain.

-
- Type in the domain you want to enable SSO on:
-
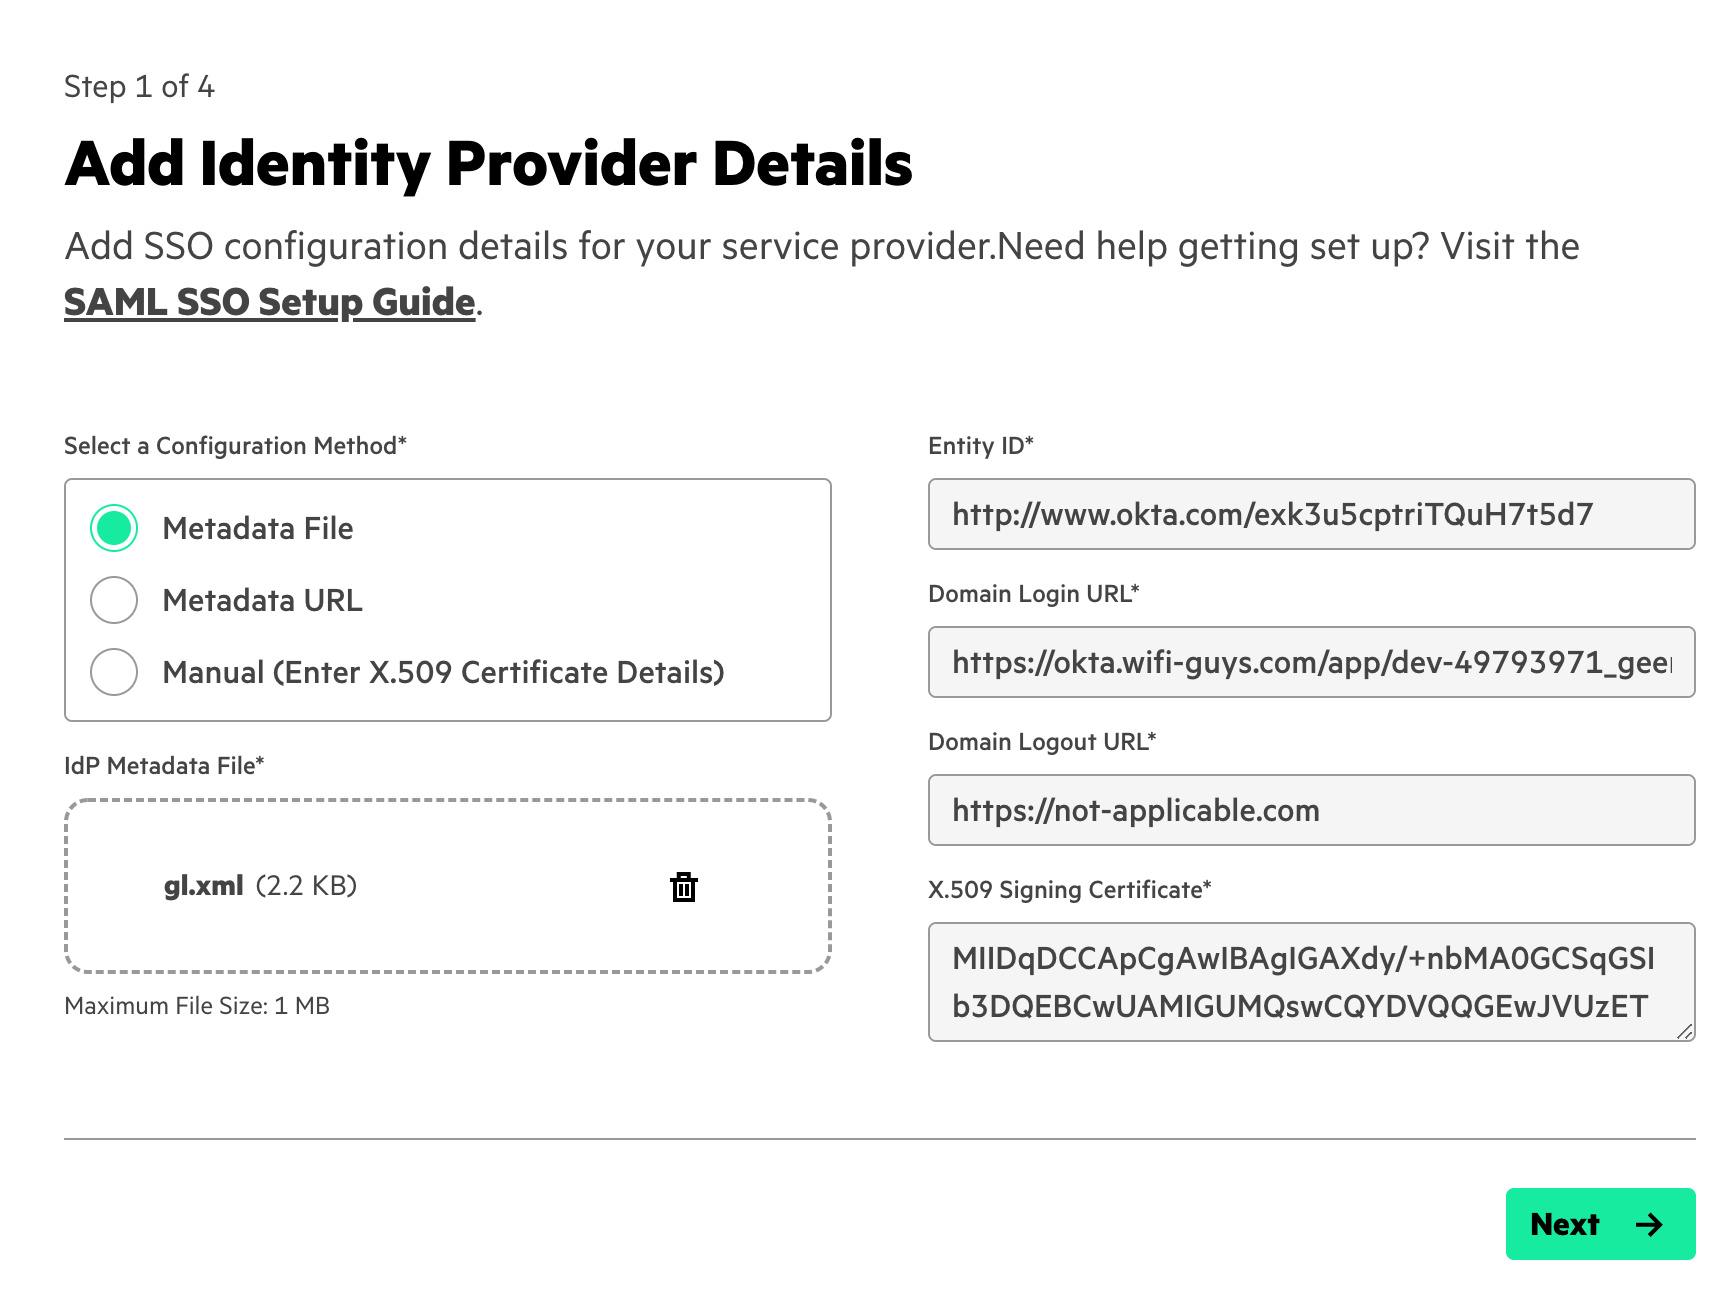
- Input the metadata from the above step
While GreenLake does support manually entering this info, it’s recommended to simply upload the XML metadata that was downloaded in the previous step. Select Metadata File and select the XML. Then click Next.
-
- Enter the SAML attributes to match what was entered in Okta and set the idle timeout value as well.
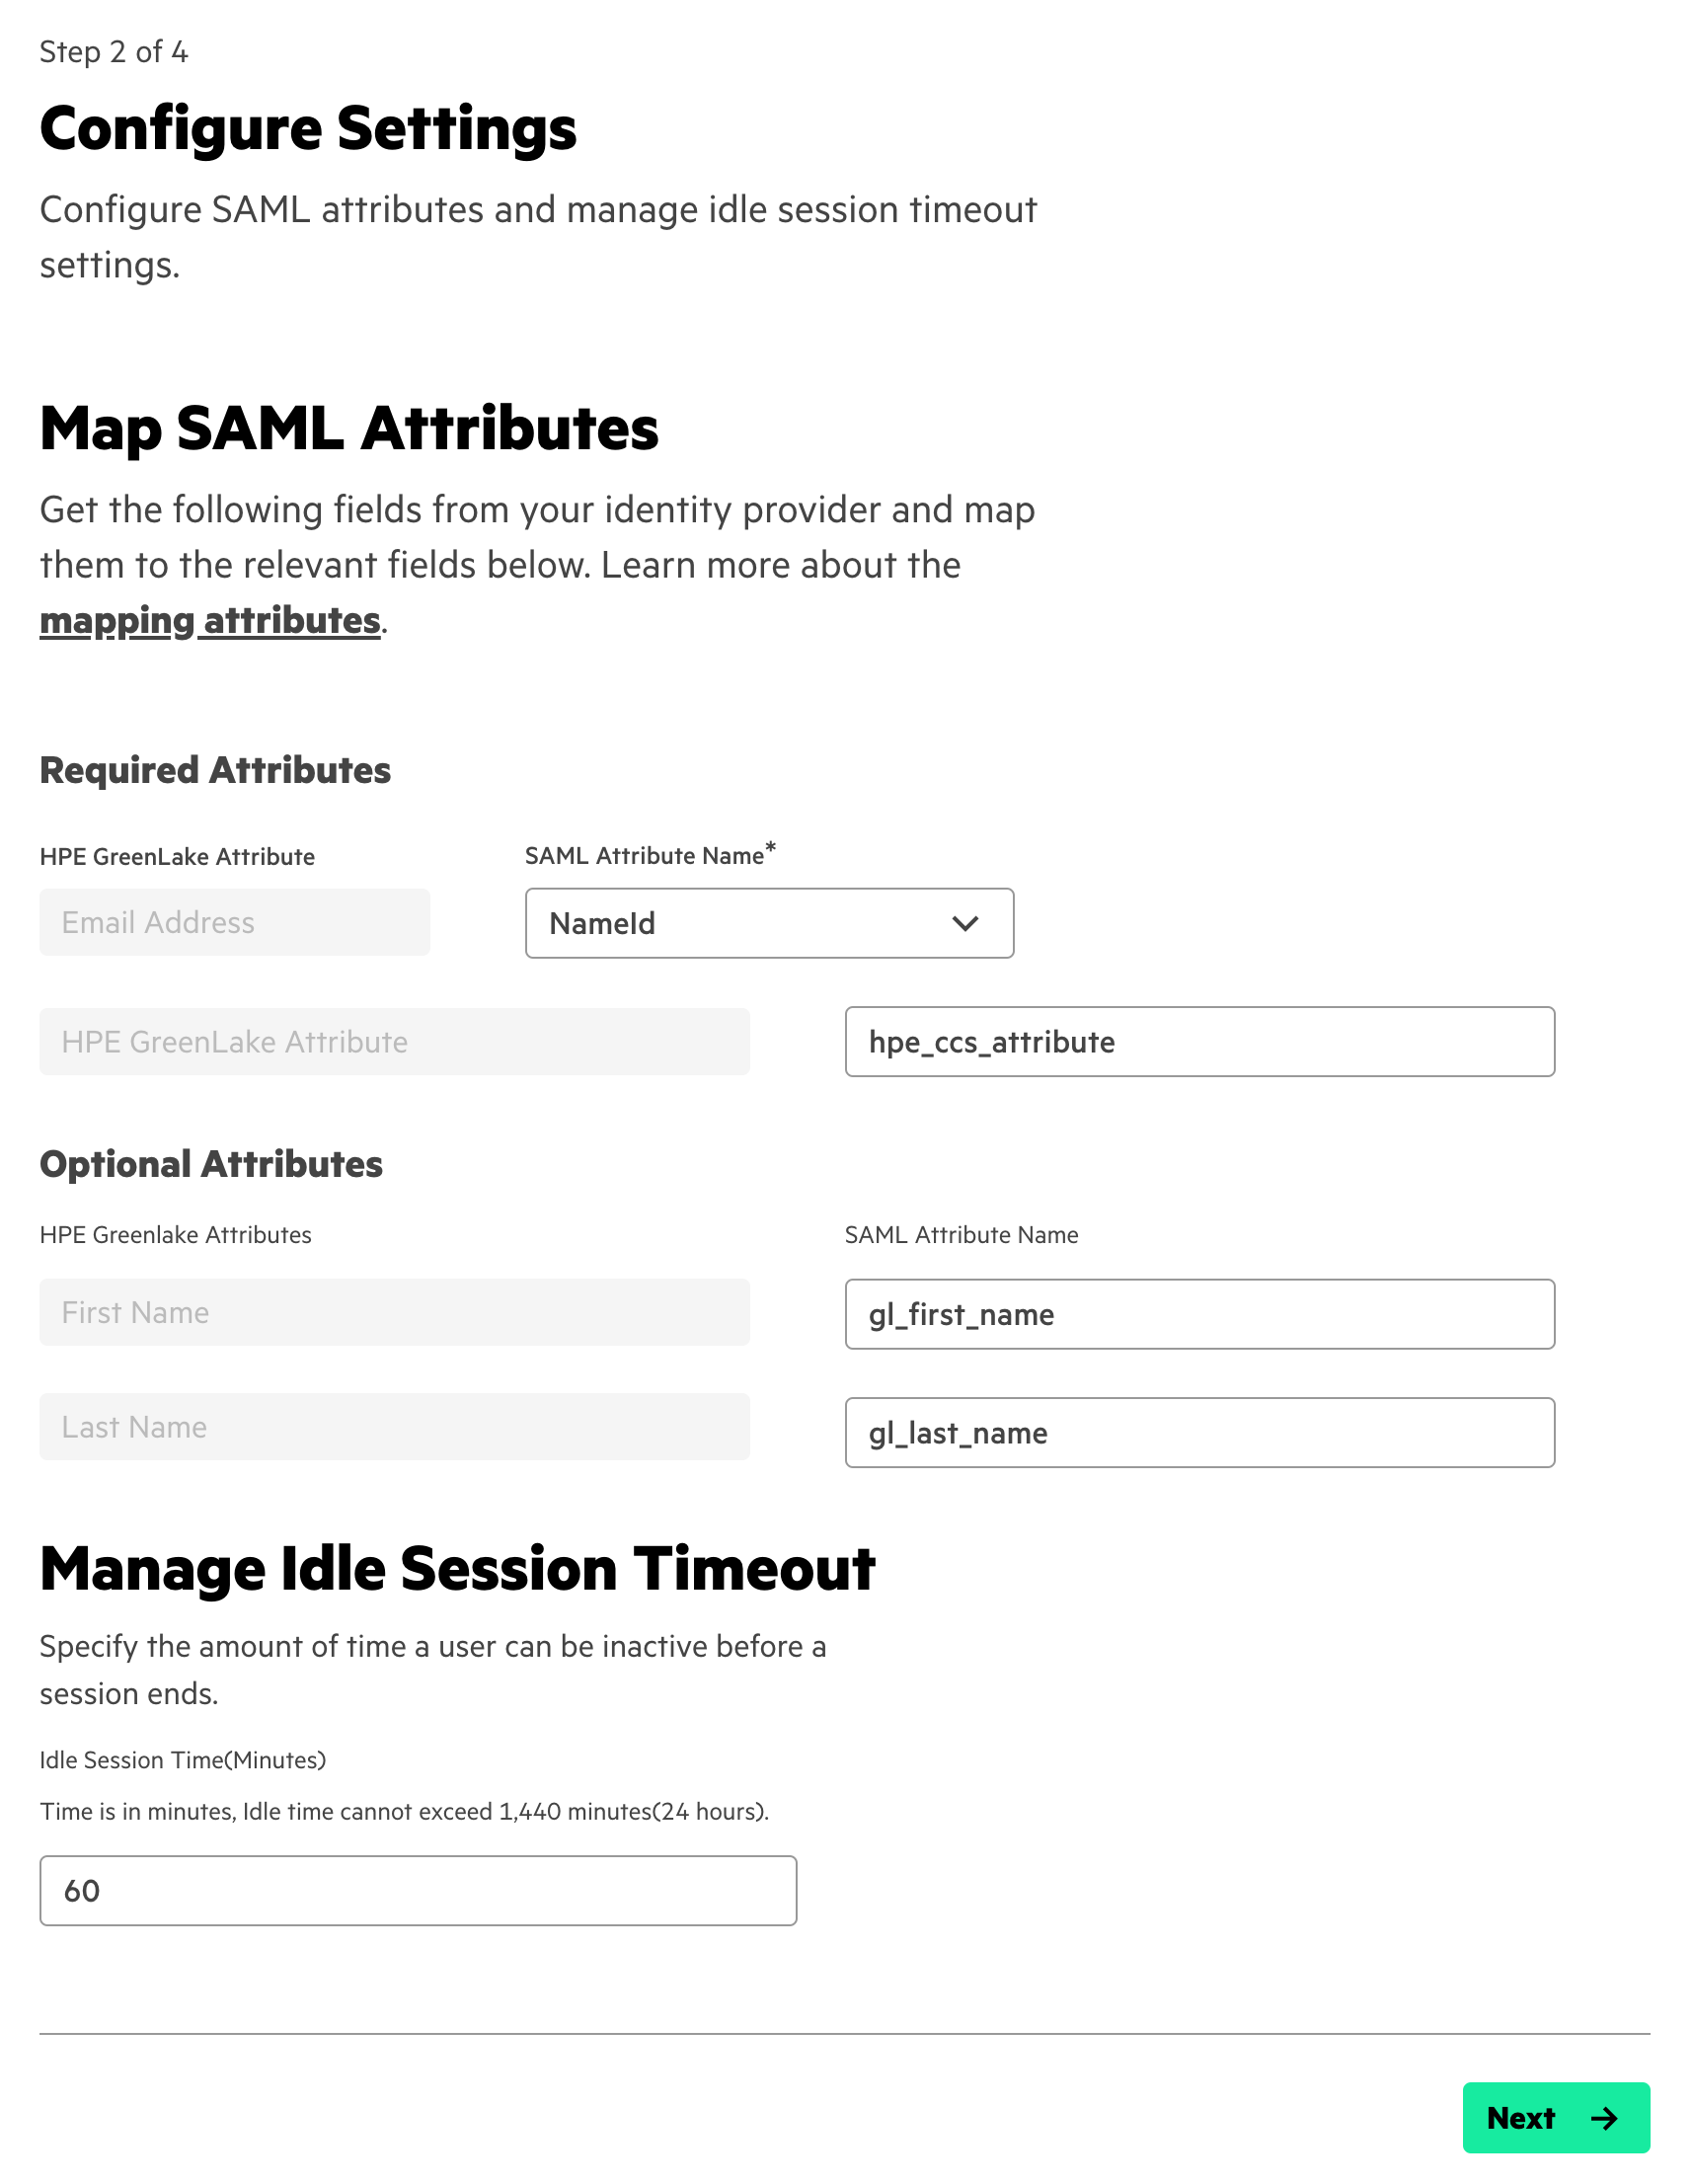
- Then click Next.
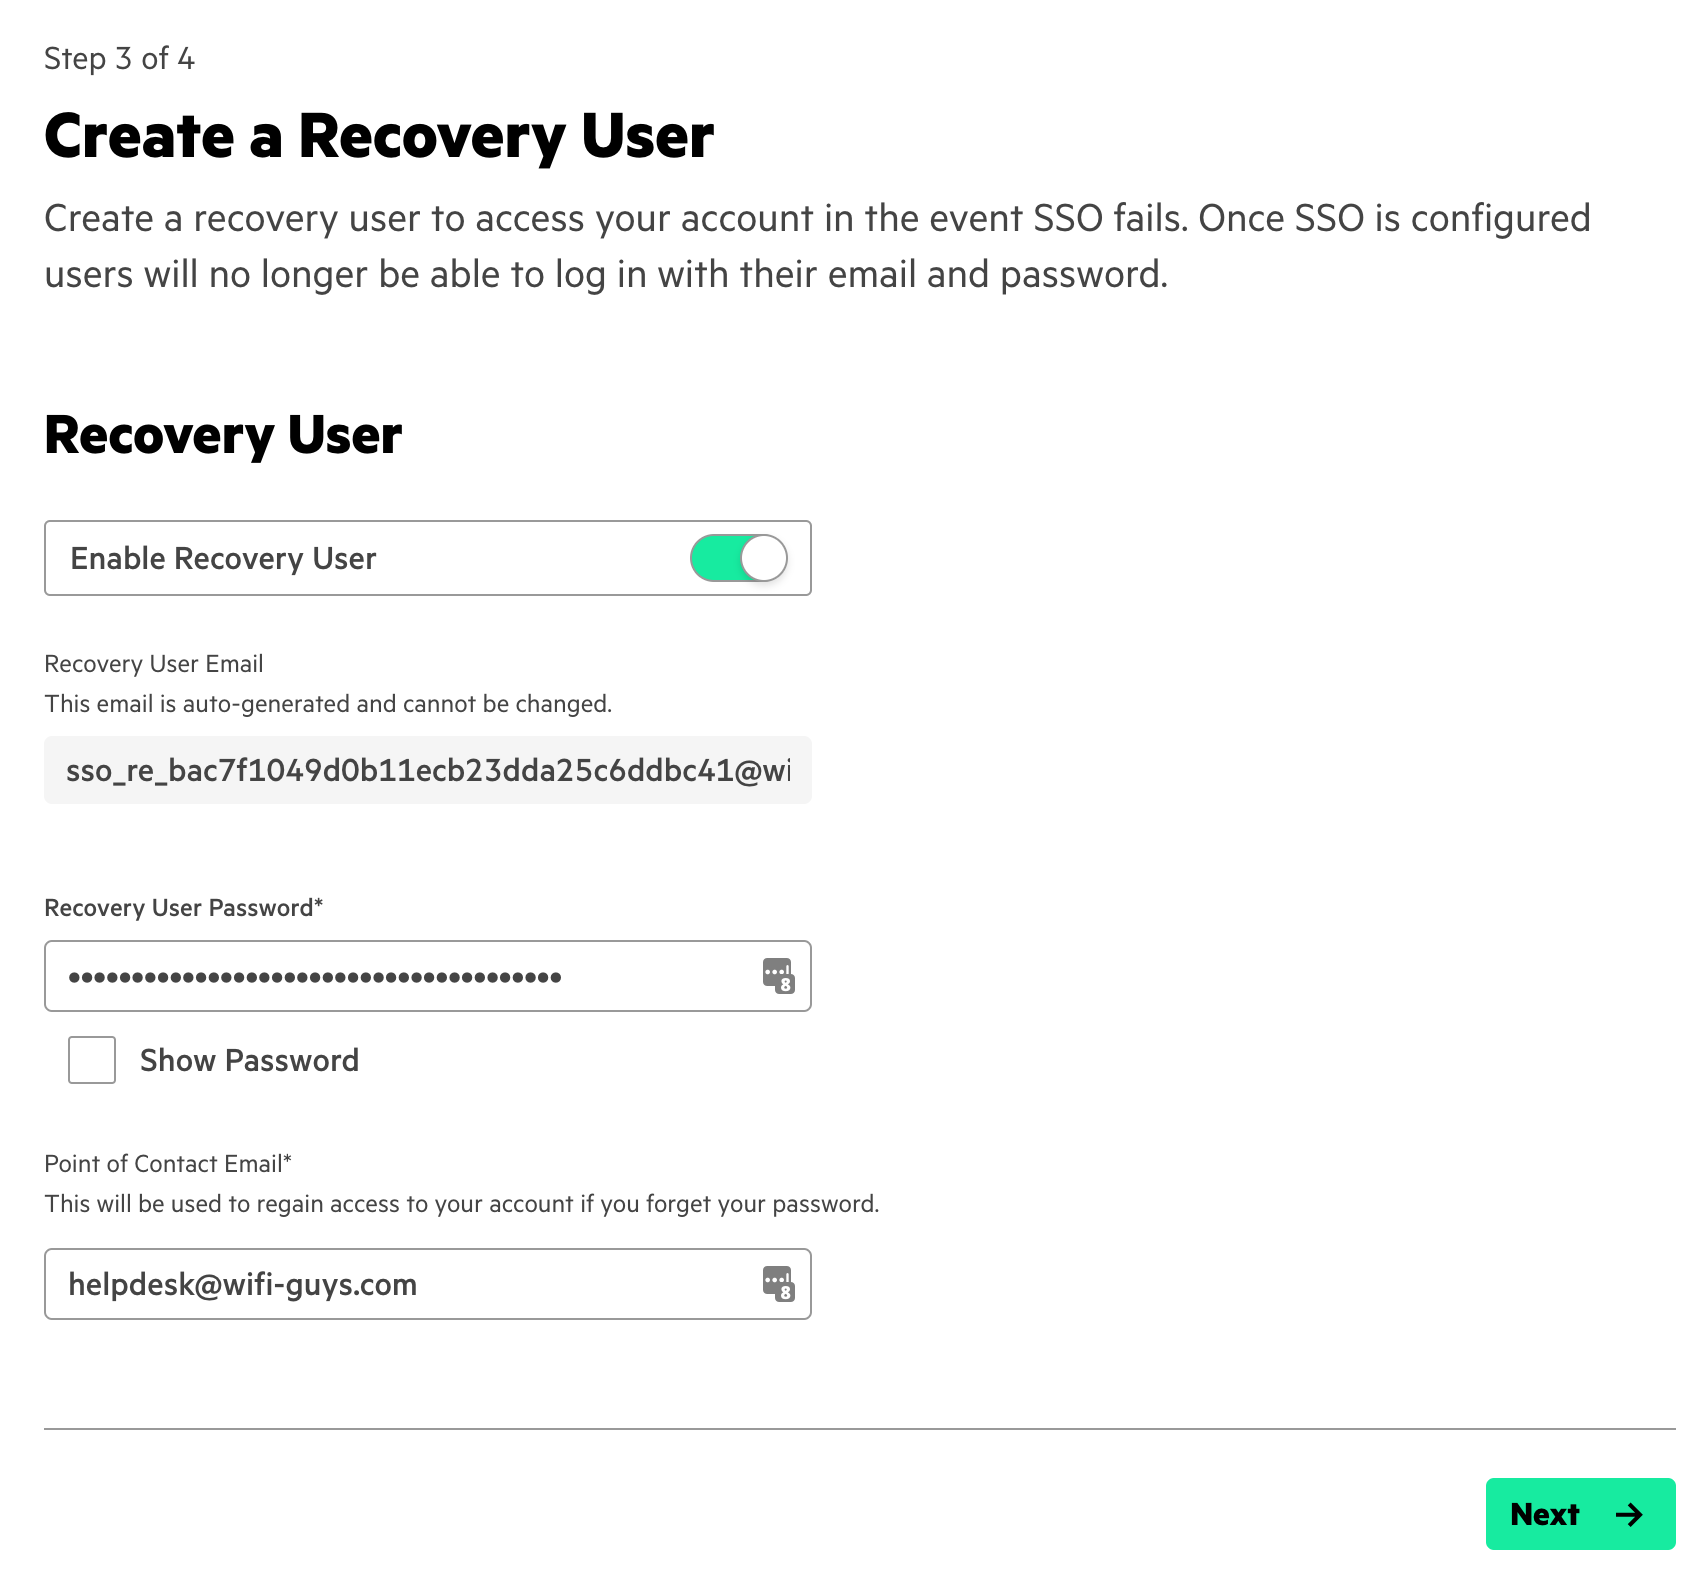
- Create a recovery user in the event SSO fails, an admin will still be able to access GreenLake.
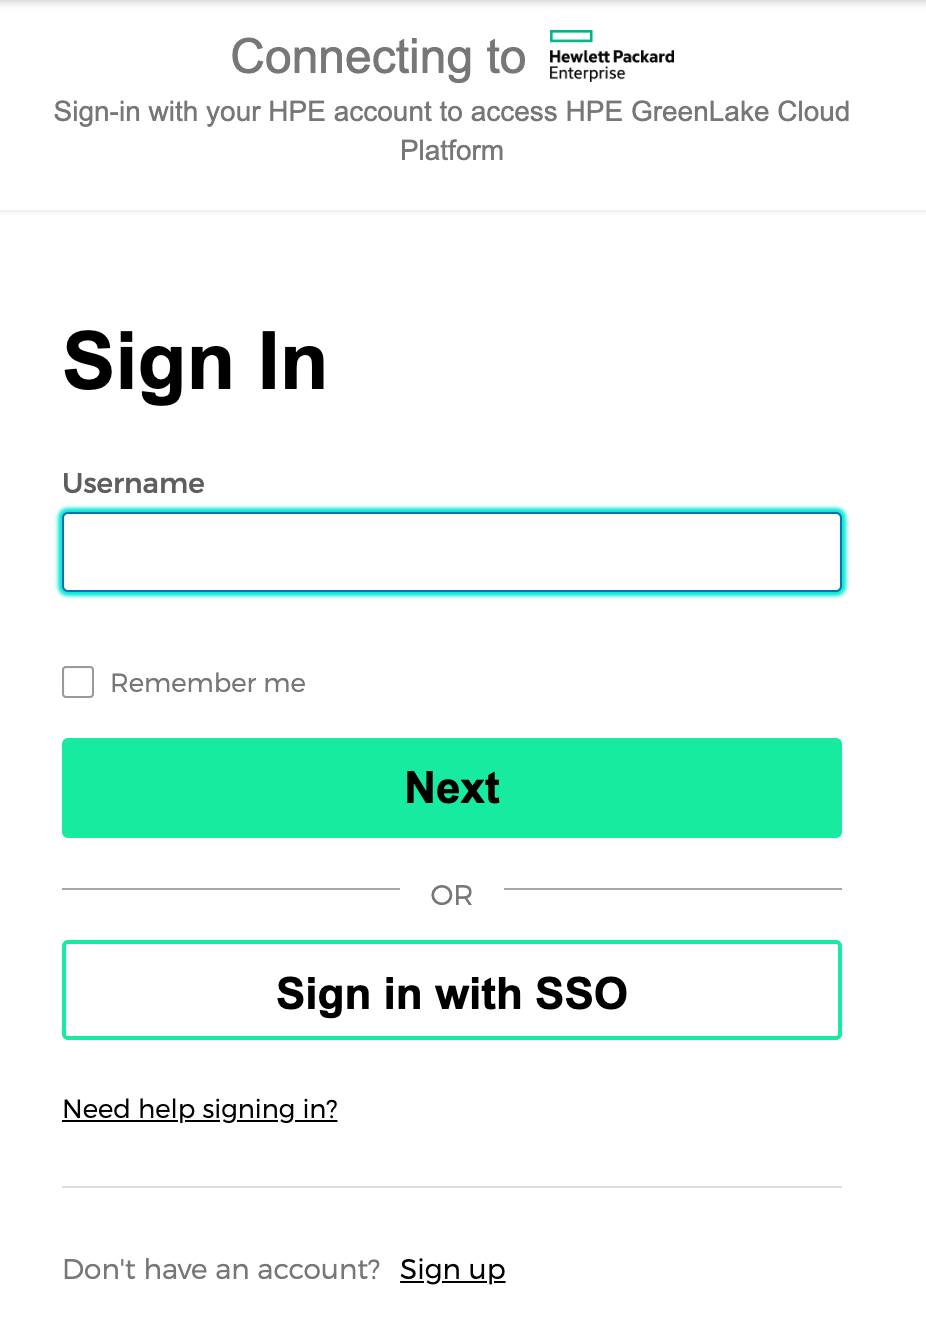
Congratulations SSO will now be enabled for GreenLake as well as the Aruba Central application. Log out and on the GrenLake home page, click Sign in with SSO.
Testing and Troubleshooting:
On the GreenLake Cloud Platform home page, Click Sign in with SSO.
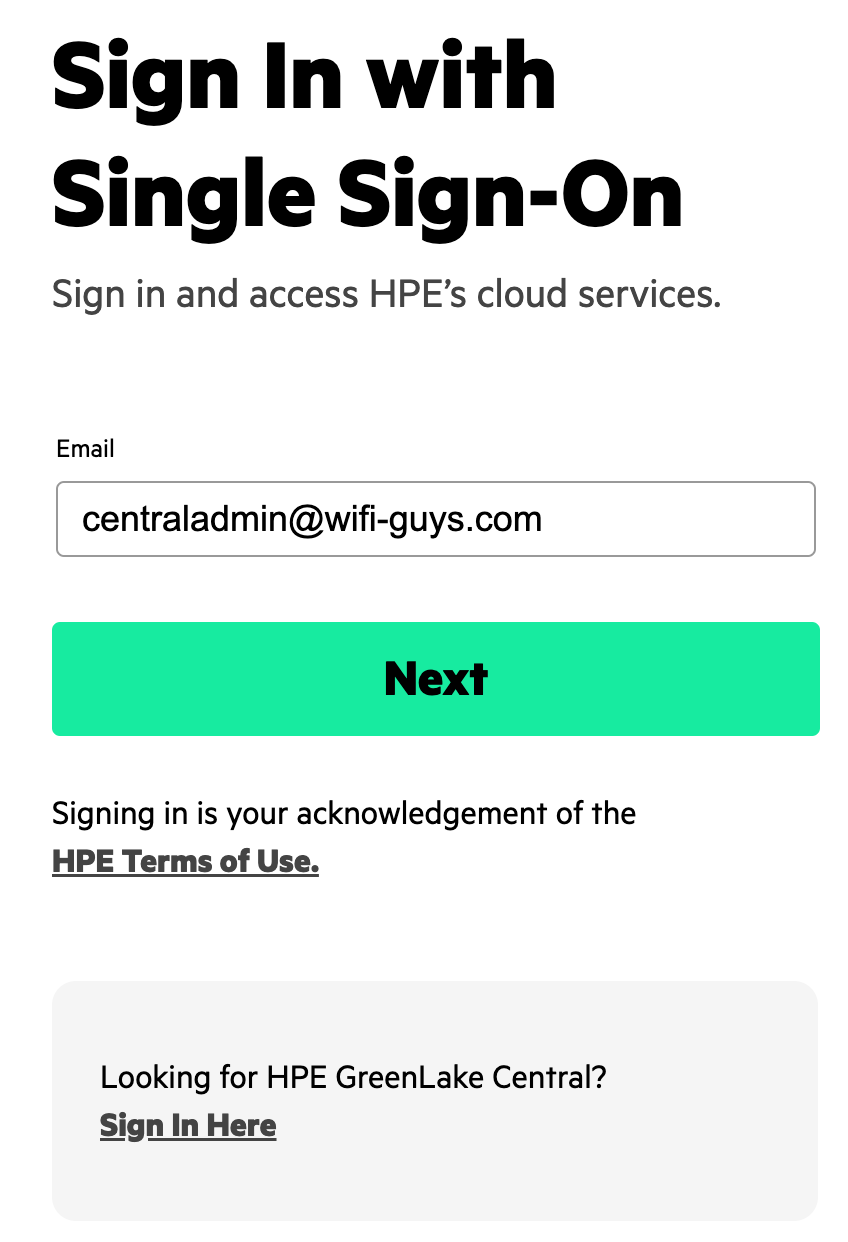
Enter the SSO credentials and you will be redirected to Okta to authenticate. Once you successfully authenticate, you will be redirected back to GreenLake. You can then click on the Aruba Central application and given access based on the configured role/permissions.
Additional Notes:
-
-
- There must be at least one verified user belonging to the Domain prior to configuration.
- In order to configure SSO, you must be logged into GreenLake with a user from the domain.
- SSO user access is determined by the “role_name” attribute included in the SAML hpe_ccs_attribute provided by the IdP.
- SSO users can initiate a Single Sign On request by trying to log in to Aruba Central (SP-initiated login).
- For more troubleshooting: https://support.hpe.com/hpesc/public/docDisplay?docId=a00120892en_us
-
The GreenLake platform is expanding support for additional applications, including HPE Aruba Networking UXI. For the latest updates and supported applications, please refer to the GreenLake Support Documentation.
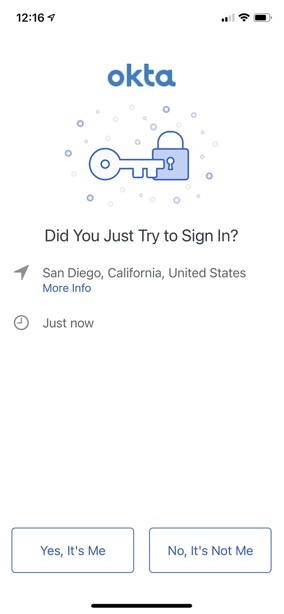
Okta MFA Example:
-
-
- Okta as well as many cloud identity providers support various MFA and other types of additional security policies.
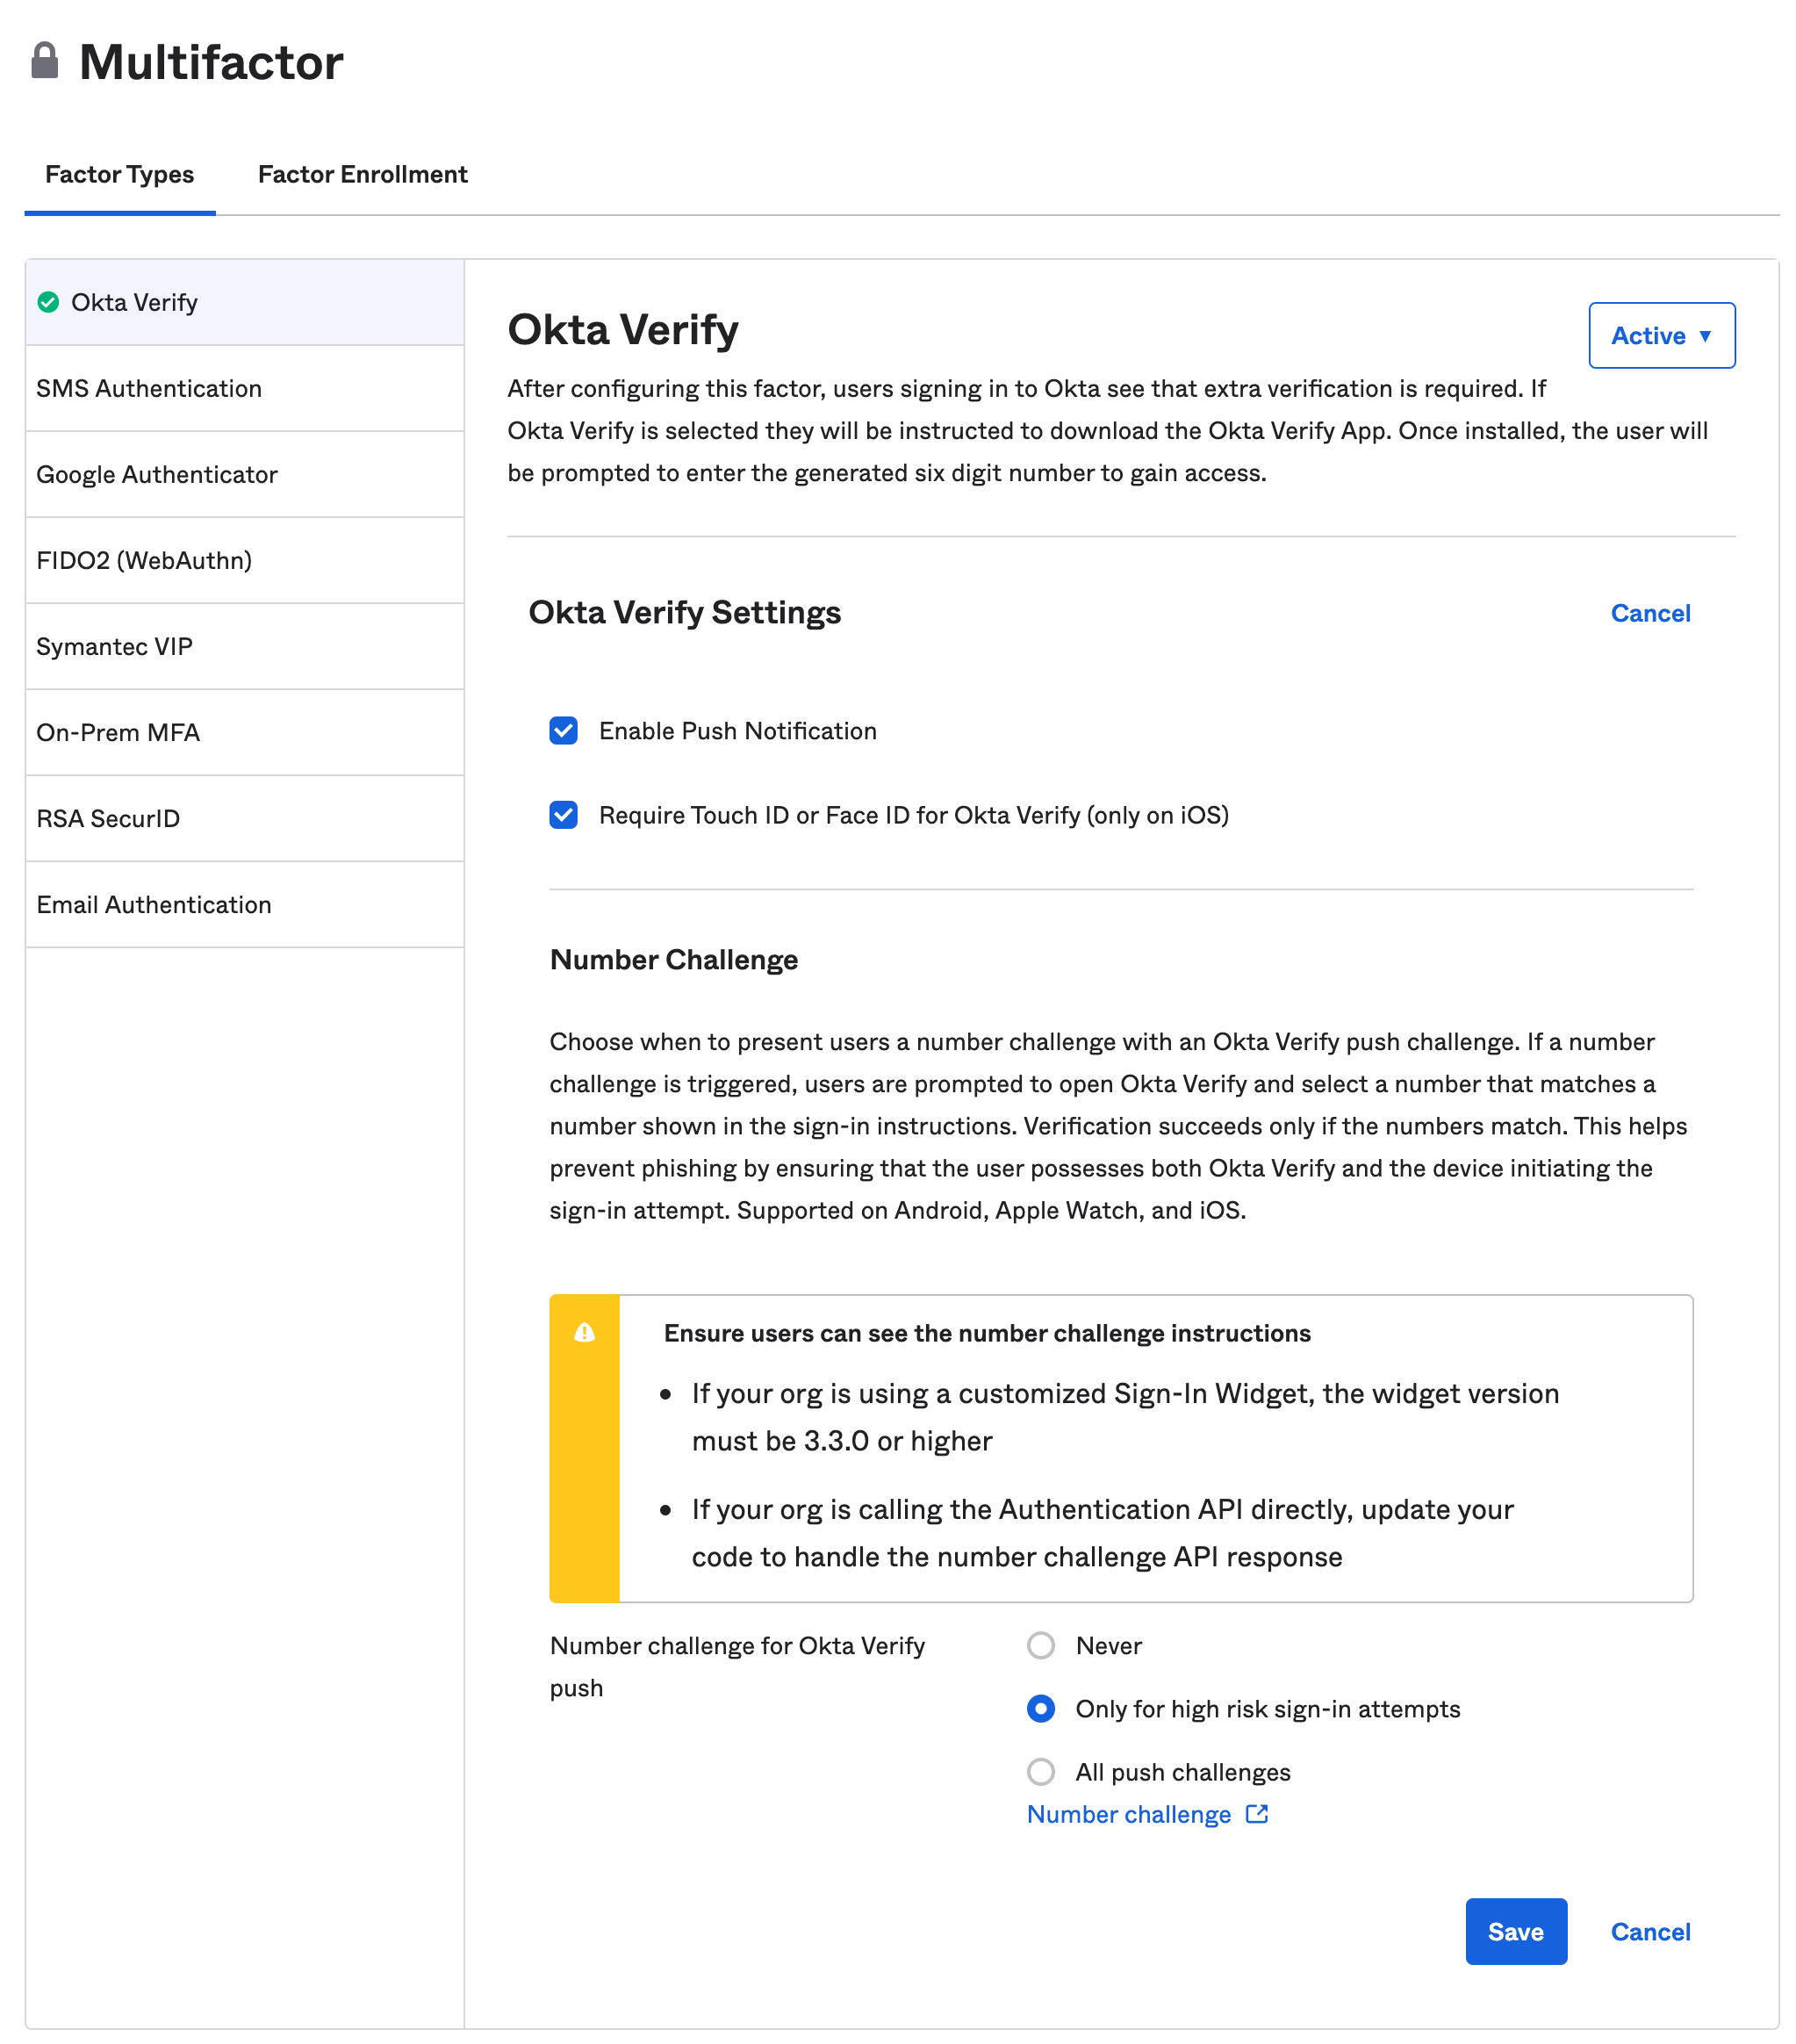
- Okta Verify (Okta native MFA app) example:
- Okta Admin portal > Security > MFA > Factor Type – Okta Verify Enable
-
-
-
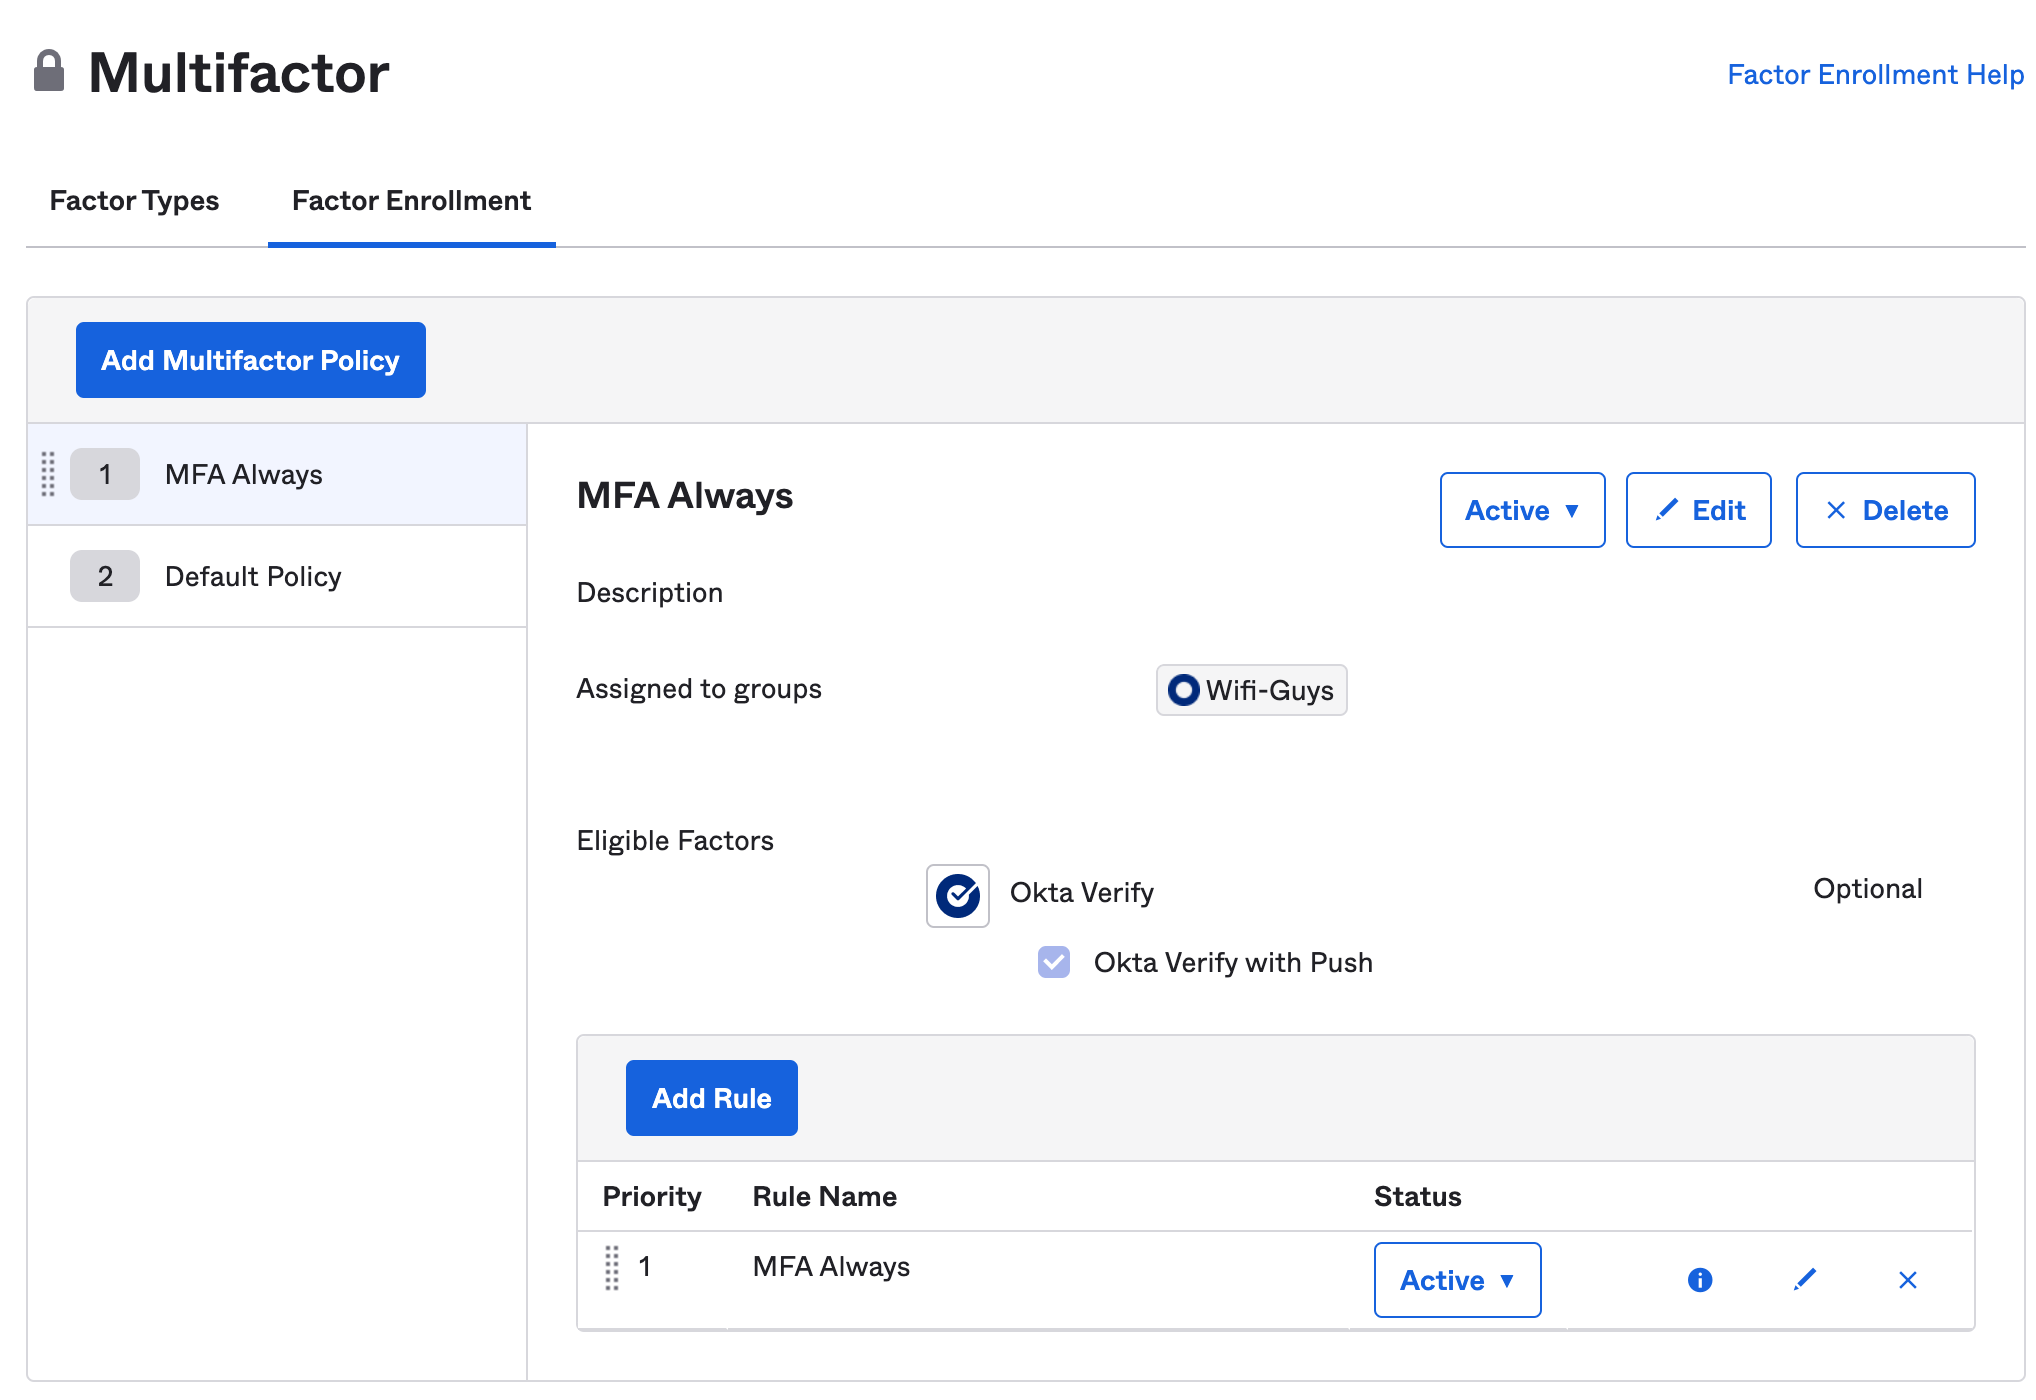
- Click Factor Enrollment and create an enrollment policy.
- Then select the user groups to apply this policy to.
- For MFA enable verify with push.
-
When the user attempts to log into Aruba Central they will be sent a challenge through the Okta app. If this is the first time, the user may be asked to enroll by installing the app and scanning a QR code. After that they should only receive the push MFA notification.